Recognize barcodes in image in ASP.NET Core application with React.js
In This Topic
This tutorial shows how to create a blank ASP.NET Core Web application in Visual Studio .NET 2022 and recognize barcodes in image in ASP.NET Core application with React.js.
Here are steps, which must be done:
-
Create a blank ASP.NET Core Web application.
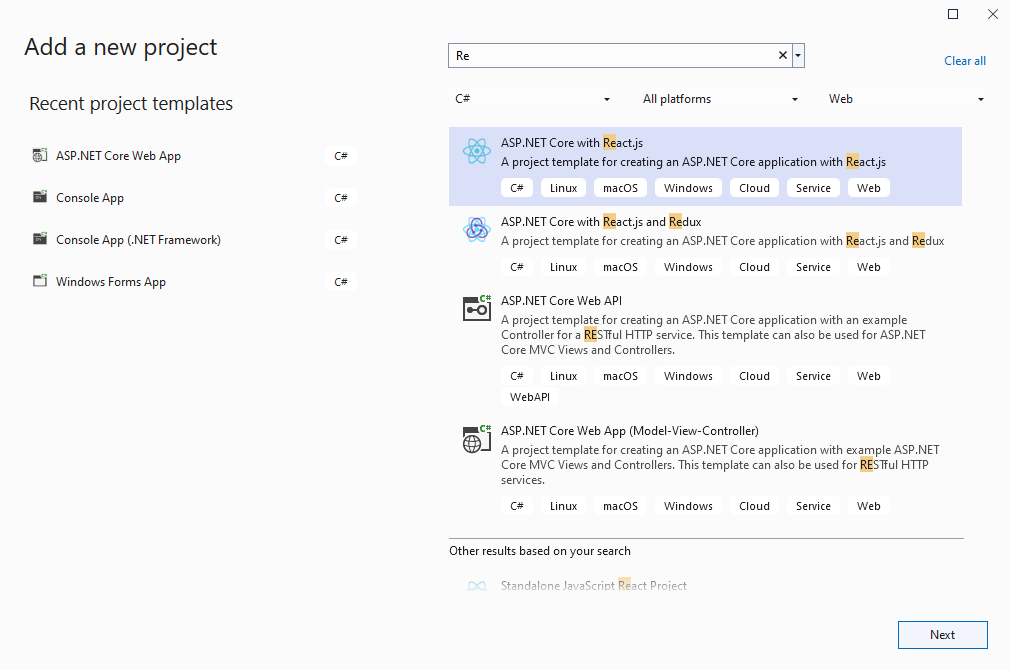
Open Visual Studio .NET 2022 and create a new project, of ASP.NET Core with React.js application type:
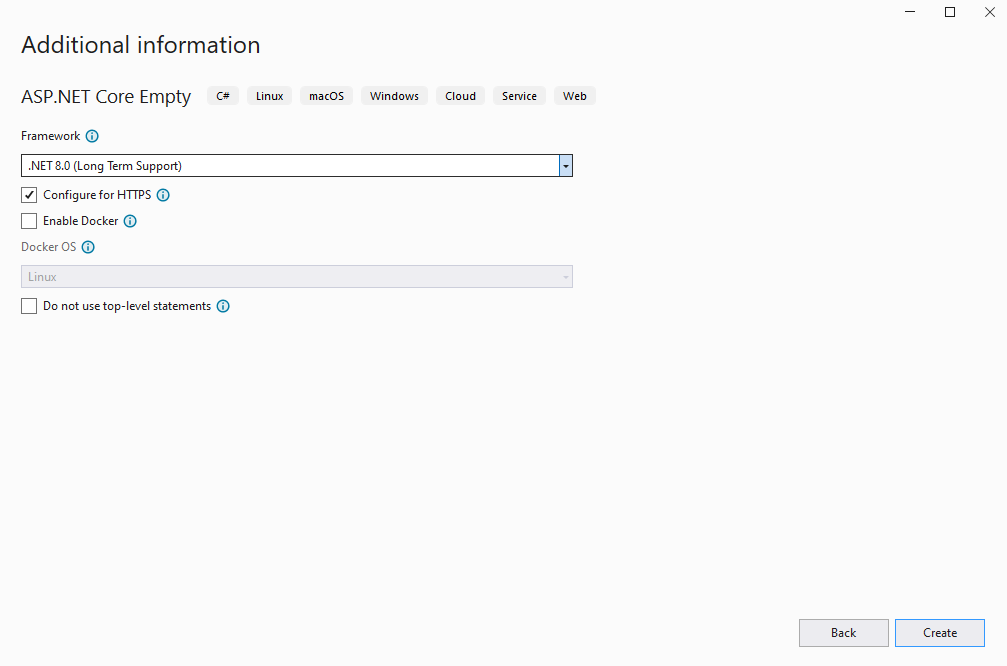
Configure the project to use .NET 8.0:
-
Server side: Add references to the Vintasoft assemblies to ASP.NET Core Web application.
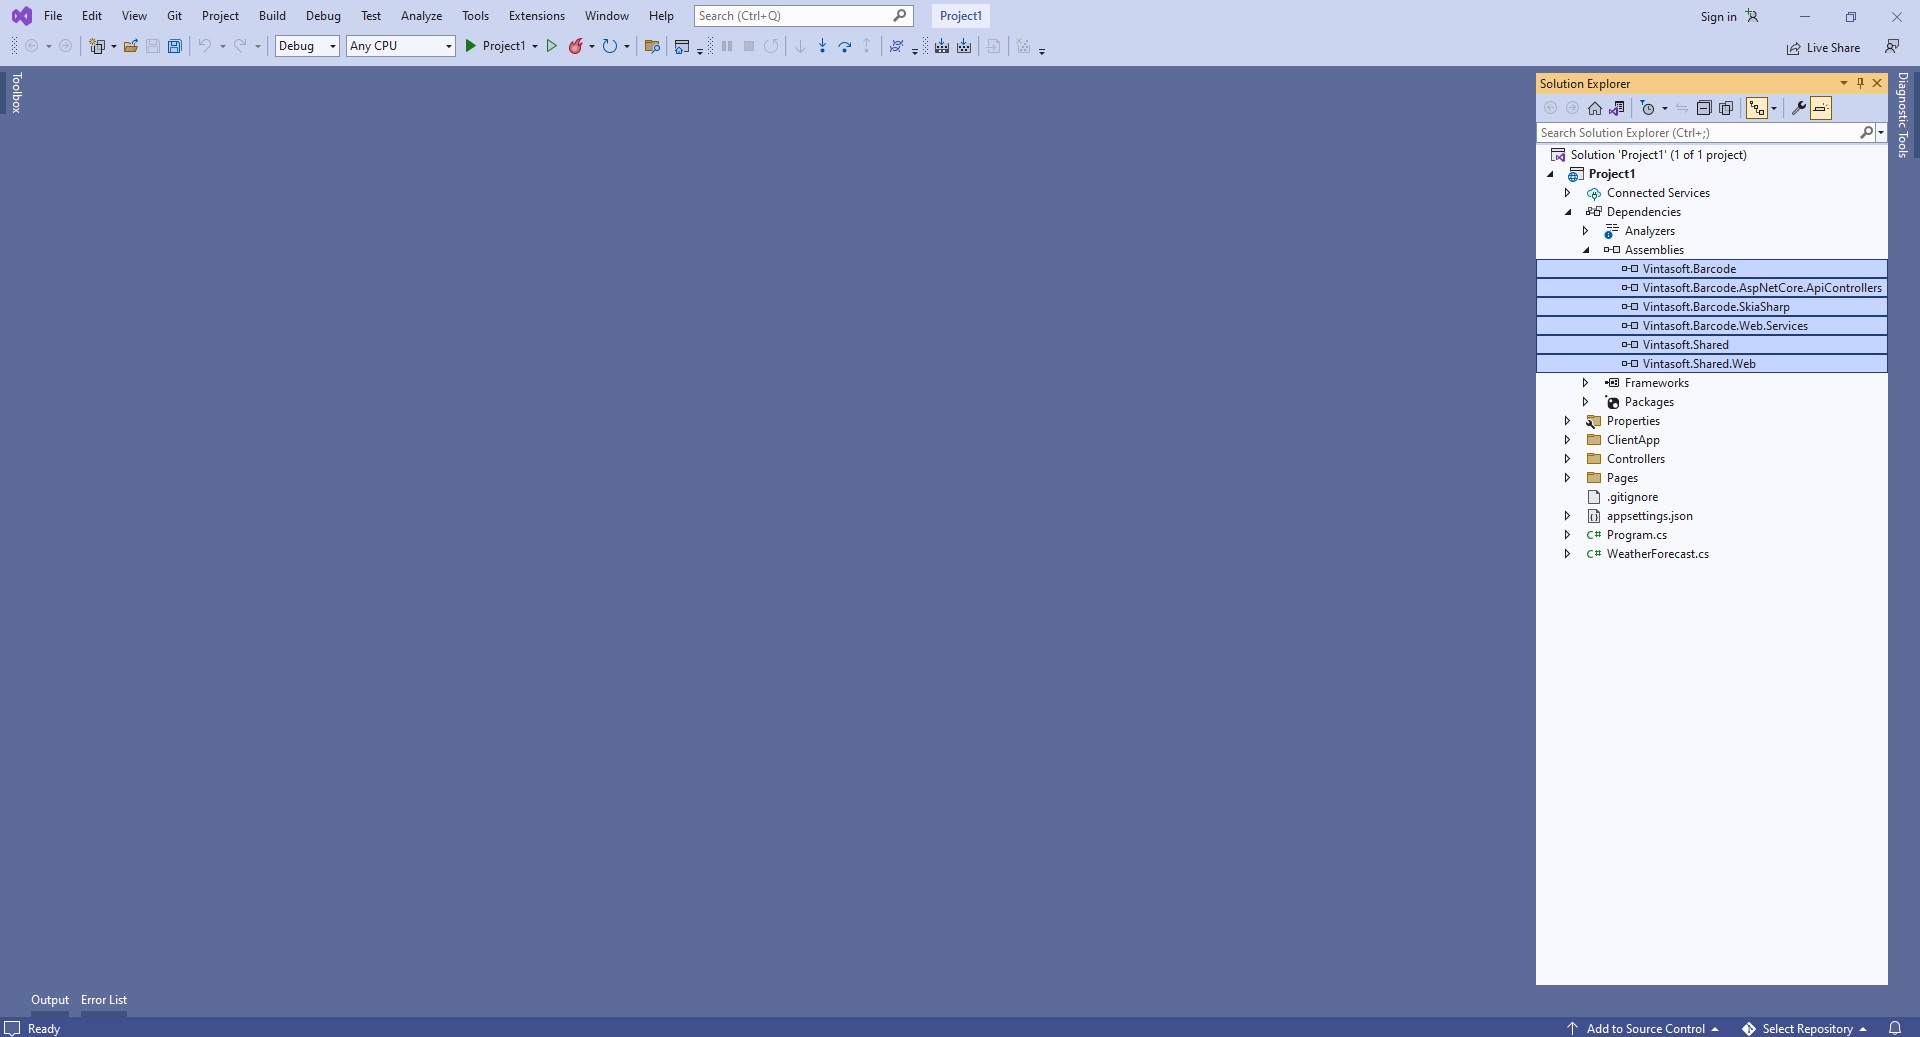
Add references to the Vintasoft.Barcode.dll, Vintasoft.Barcode.SkiaSharp.dll, Vintasoft.Shared.dll, Vintasoft.Shared.Web.dll, Vintasoft.Barcode.Web.Services.dll and Vintasoft.Barcode.AspNetCore.ApiControllers.dll assemblies from "<InstallPath>\VintaSoft Barcode .NET 15.3\Bin\DotNet8\AnyCPU\" folder in ASP.NET Core Web application.
-
Server side: Add Web API controller that allows to recognize barcodes in image.
-
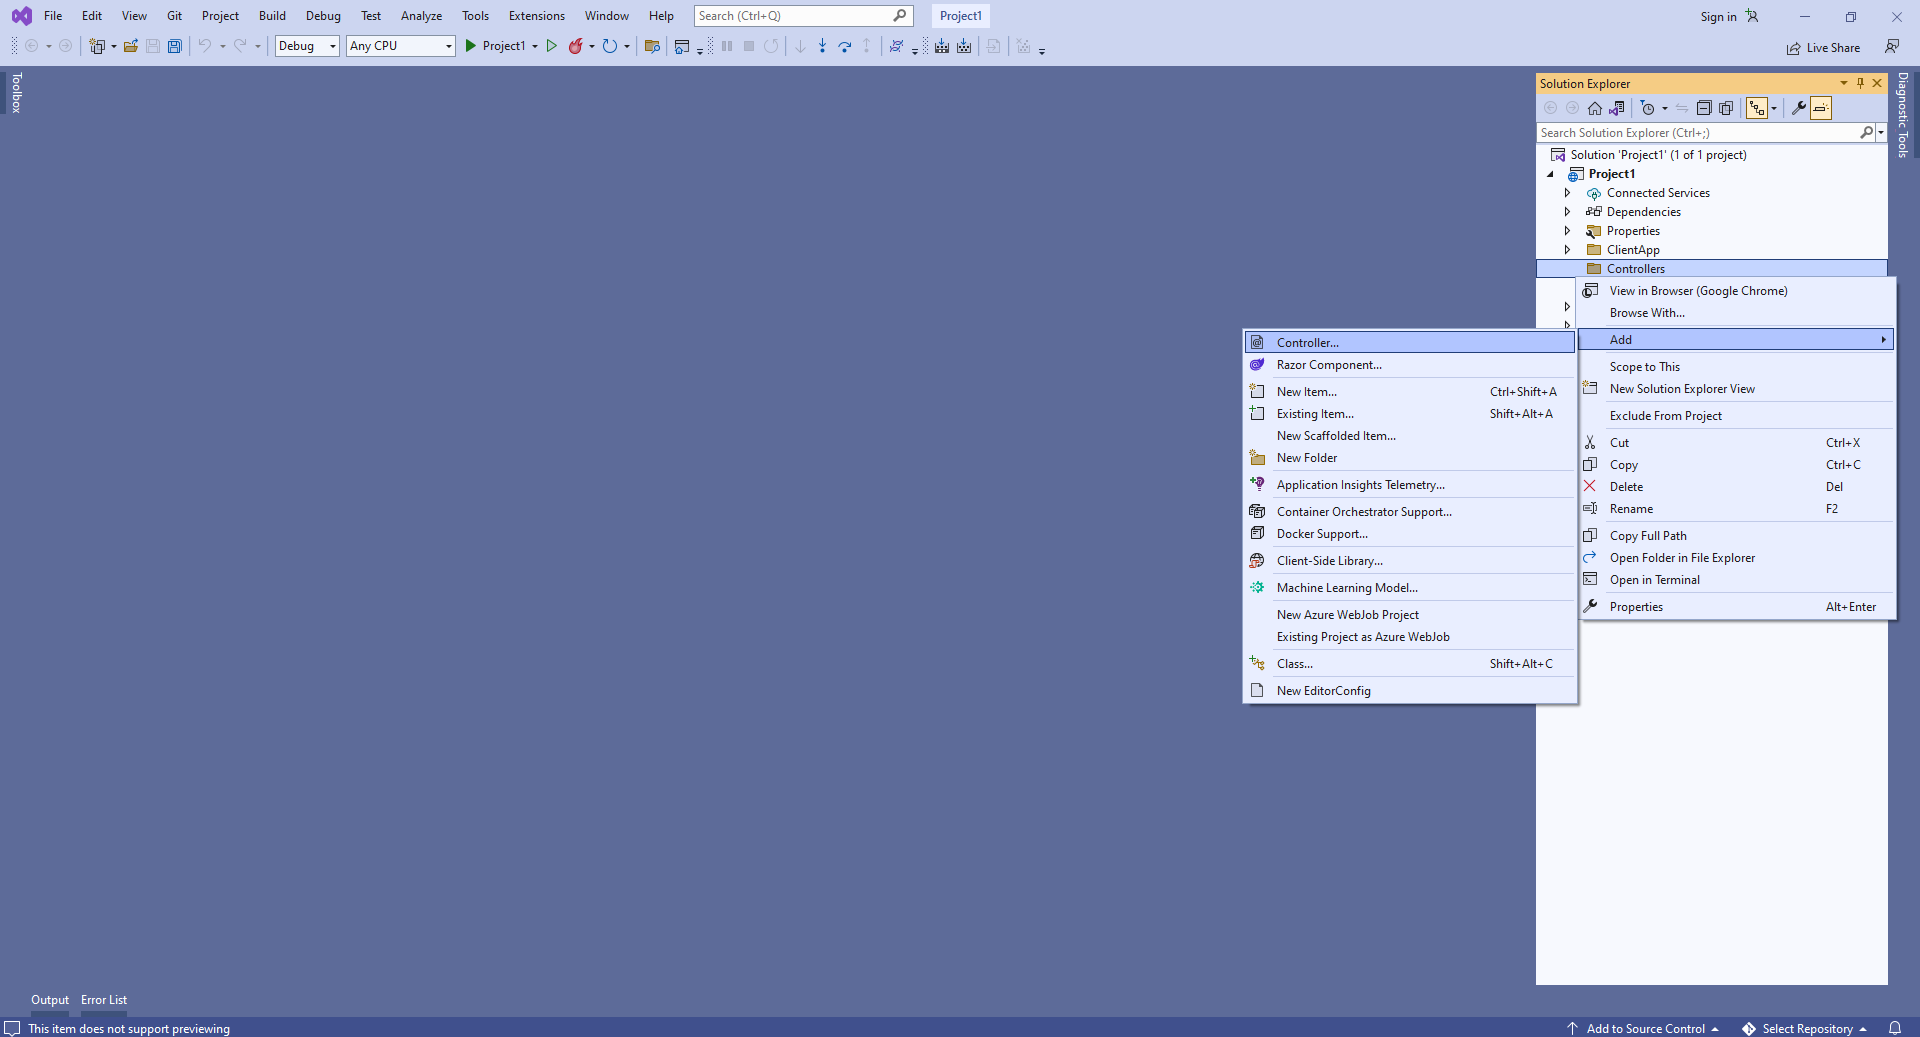
Press the right mouse button on the "Controllers" folder and select the "Add => Controller..." menu from context menu
-
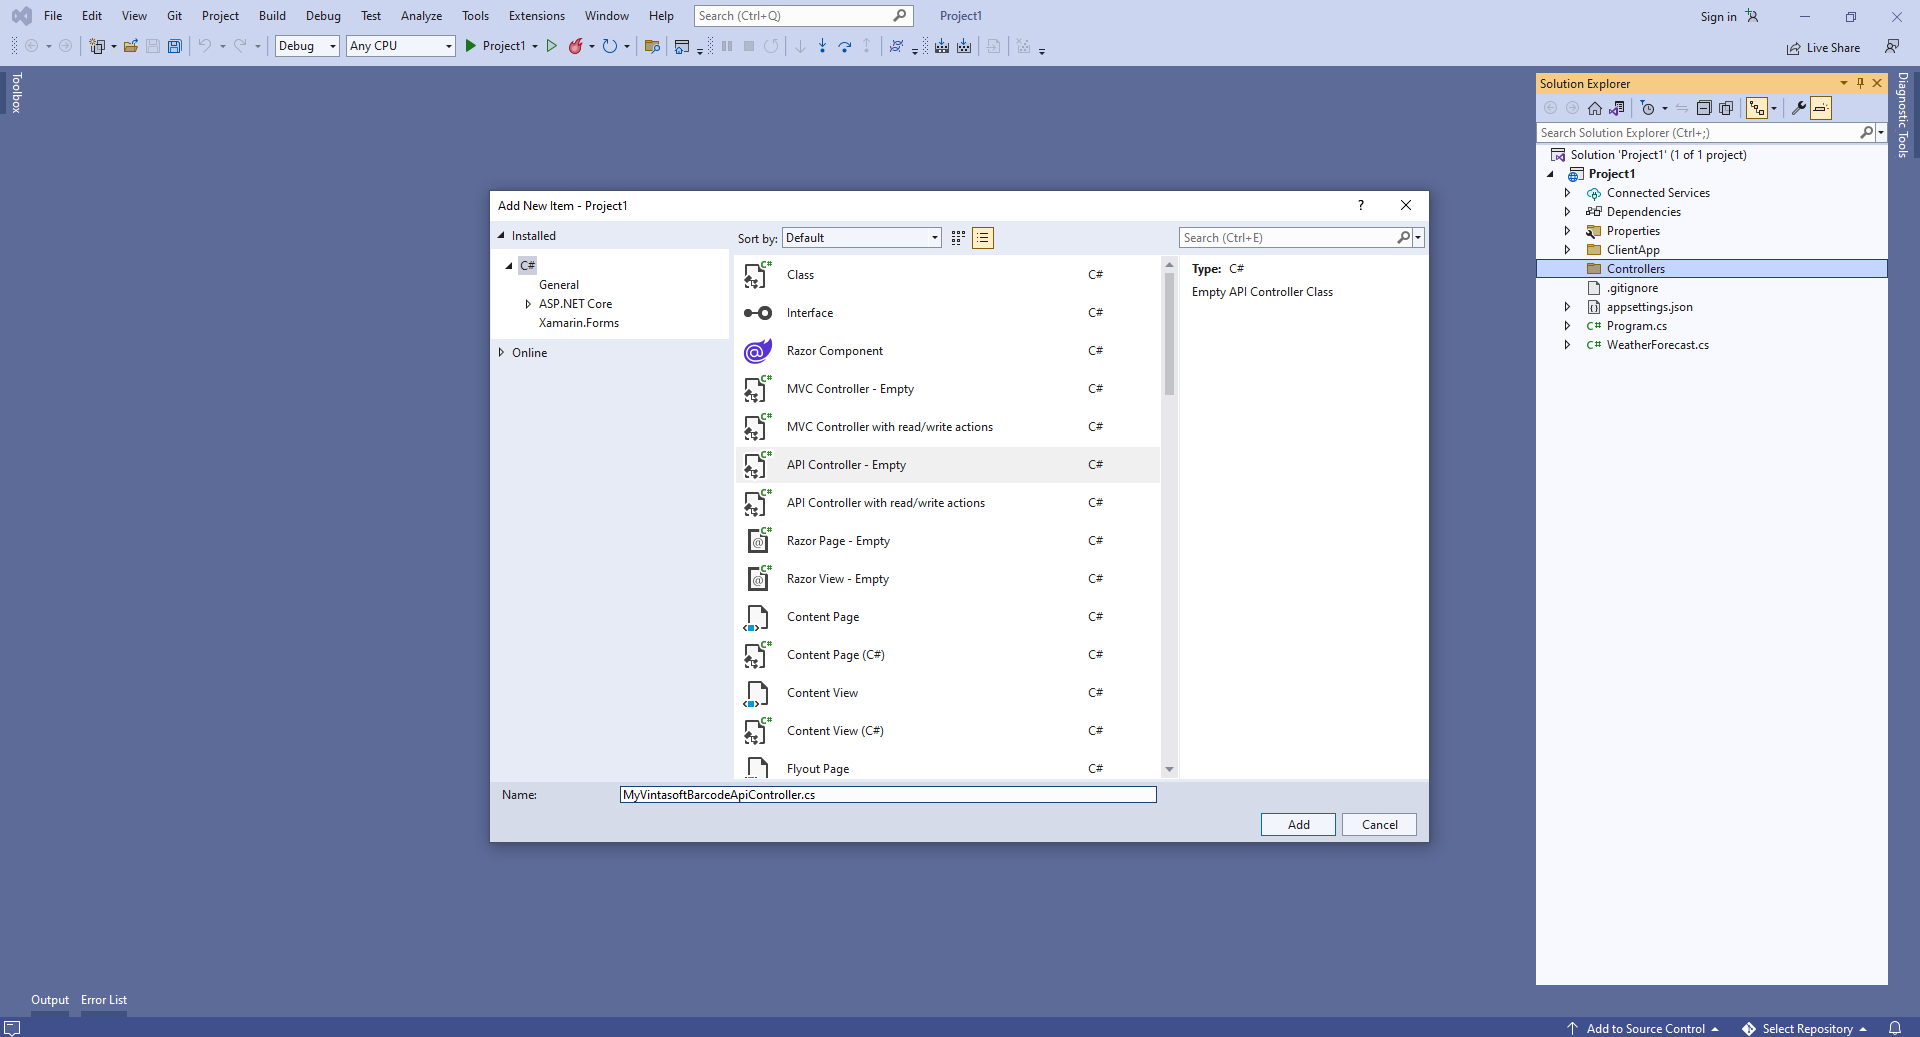
Select Empty API controller template, set the controller name to the "MyVintasoftBarcodeApiController" and press the "Add" button
-
Specify that MyVintasoftBarcodeApiController class is derived from Vintasoft.Barcode.AspNetCore.ApiControllers.VintasoftBarcodeApiController class
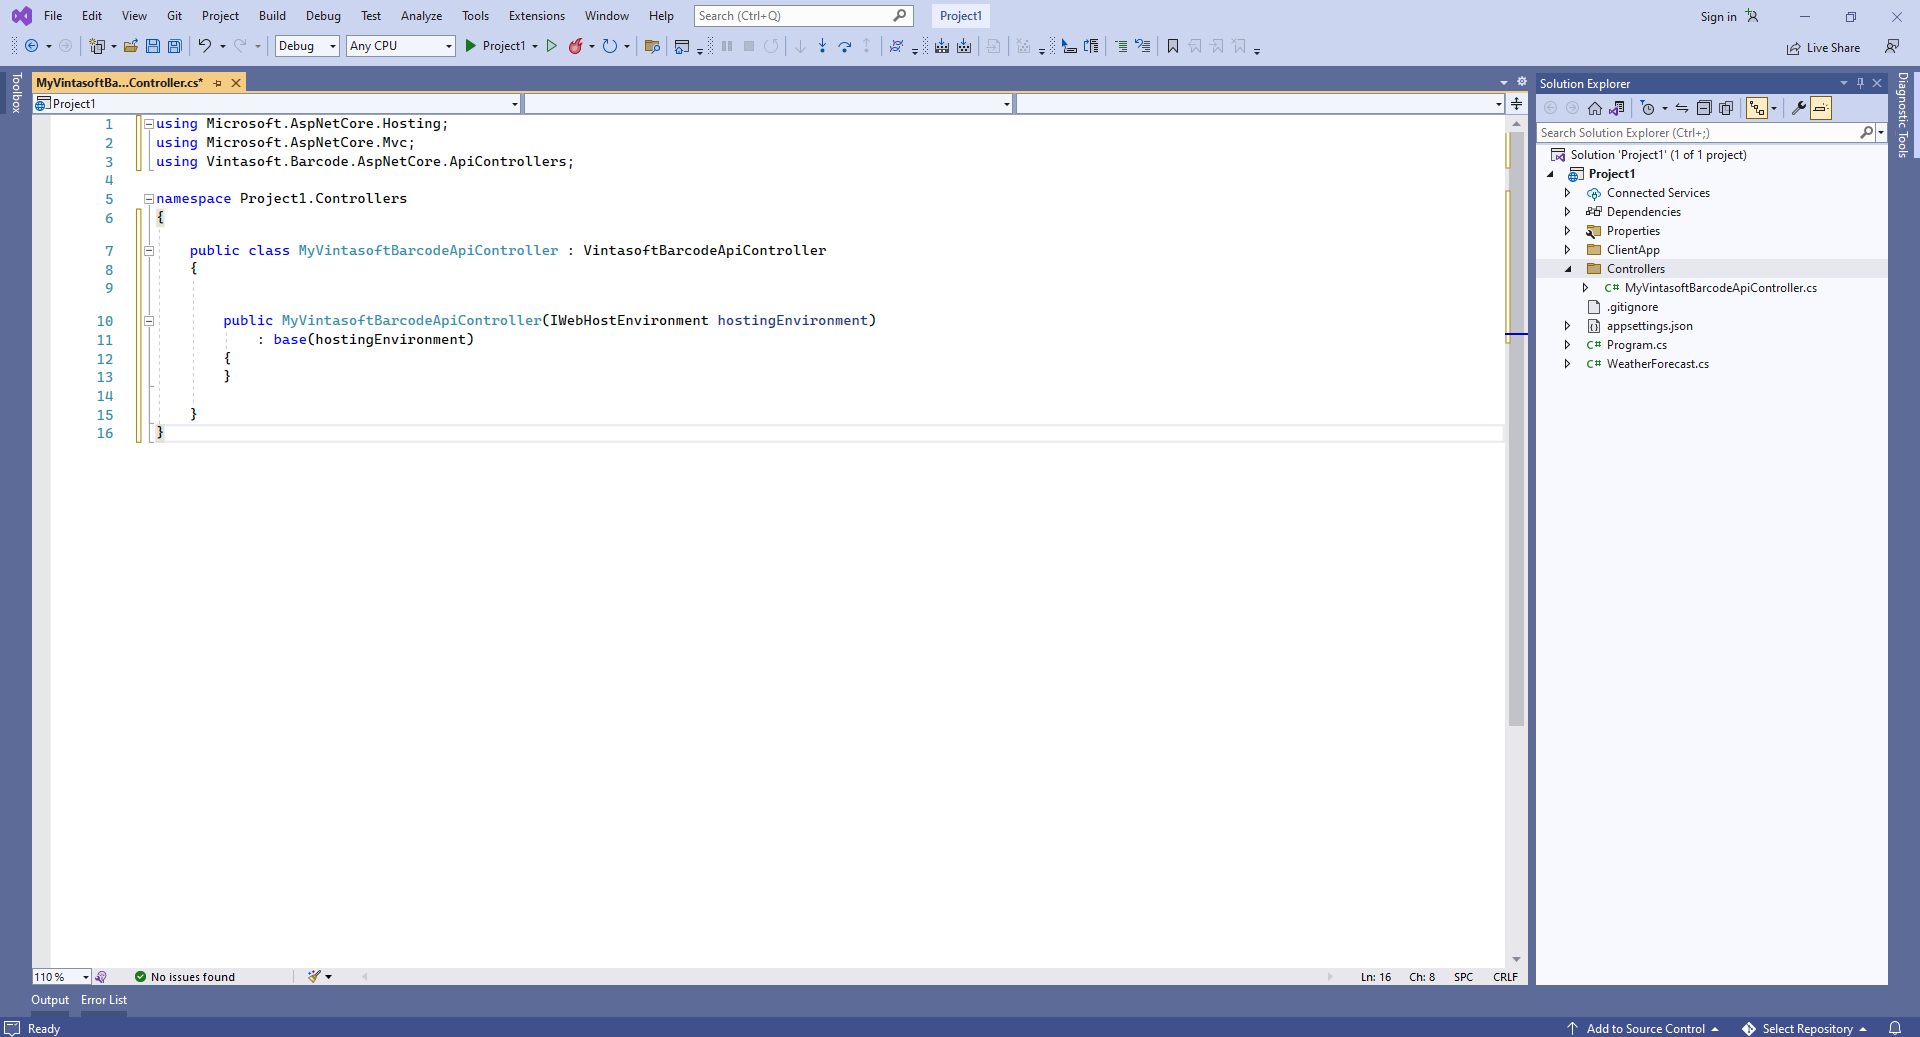
Here are source codes of MyVintasoftBarcodeApiController class:
using Microsoft.AspNetCore.Hosting;
using Microsoft.AspNetCore.Mvc;
using Vintasoft.Barcode.AspNetCore.ApiControllers;

namespace WebApplication1.Controllers
{
    public class MyVintasoftBarcodeApiController : VintasoftBarcodeApiController
    {

        public MyVintasoftBarcodeApiController(IWebHostEnvironment hostingEnvironment)
            : base(hostingEnvironment)
        {
        }

    }
}
-
Server side: Add Newtonsoft JSON for deserialization of barcode recognition results.
Add reference to the Microsoft.AspNetCore.Mvc.NewtonsoftJson nuget-package:
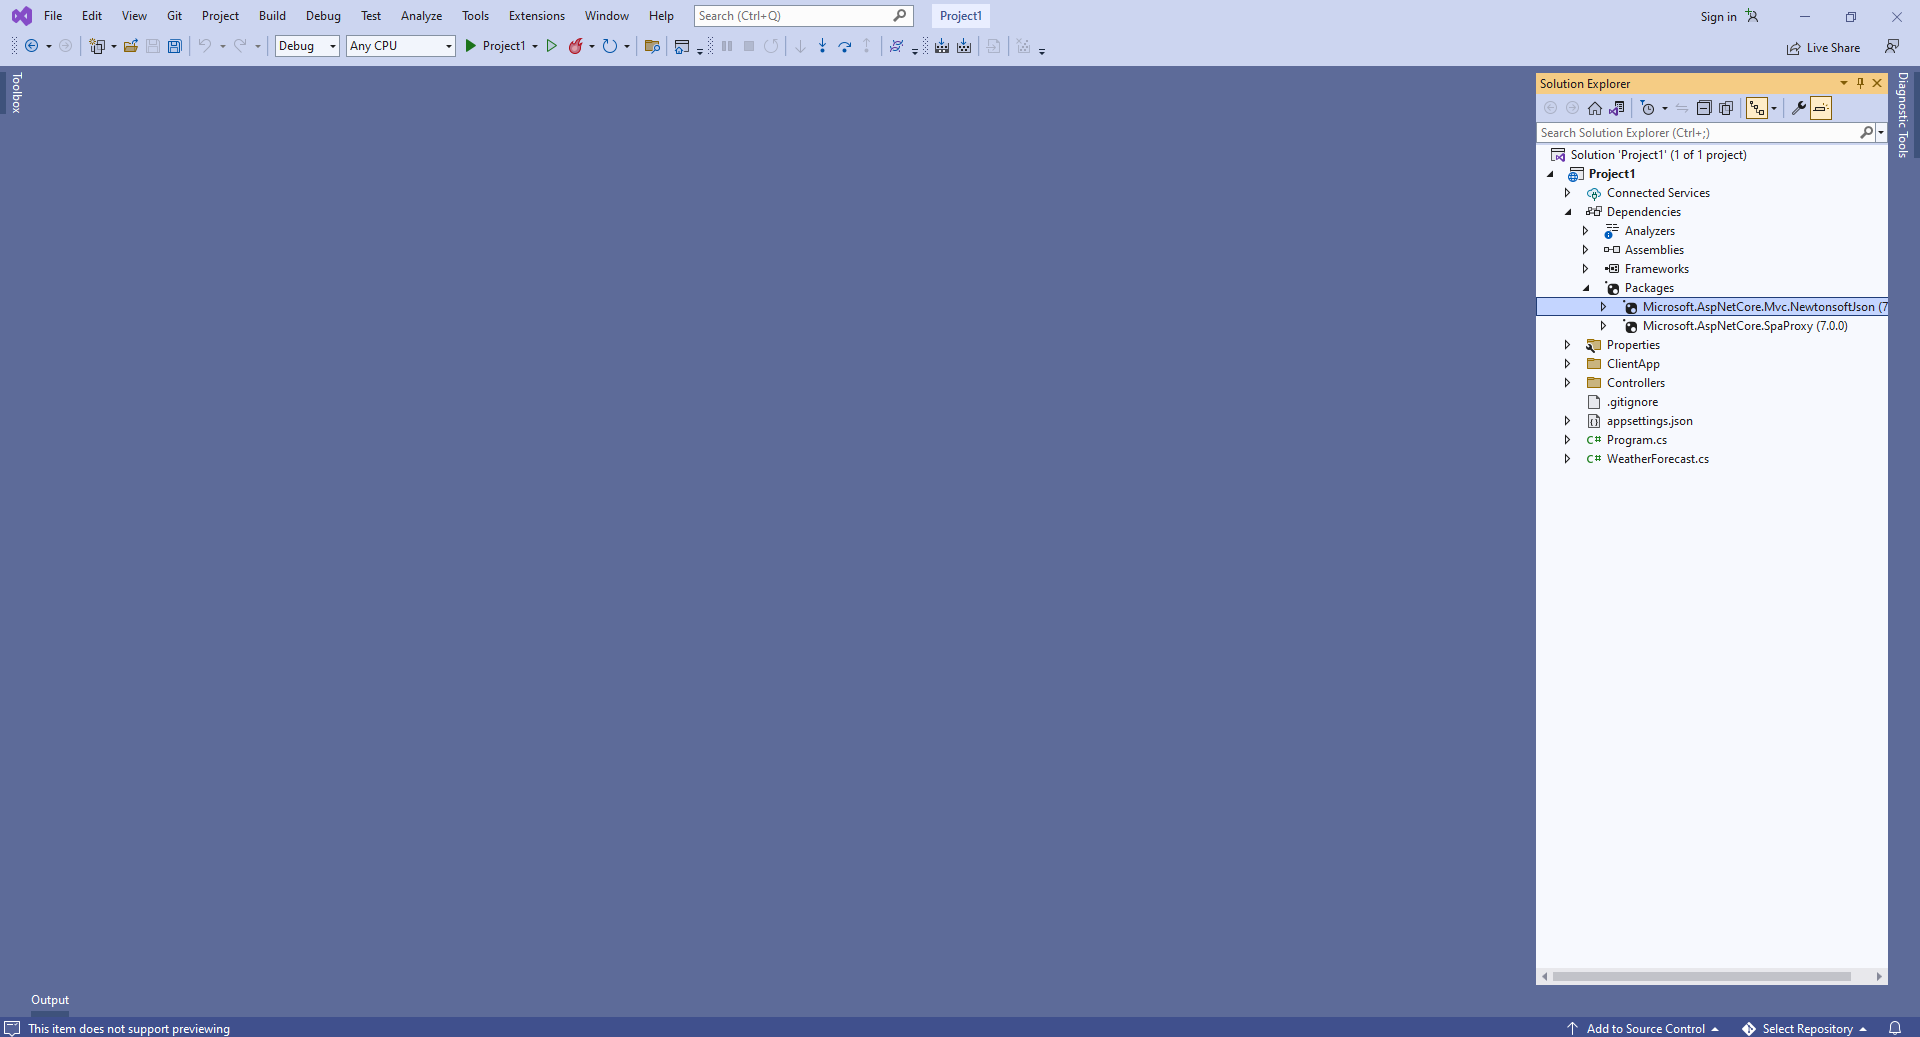
Open the "Program.cs" file and add code line "builder.Services.AddControllersWithViews().AddNewtonsoftJson();". This is necessary for correct deserialization of barcode recognition results.
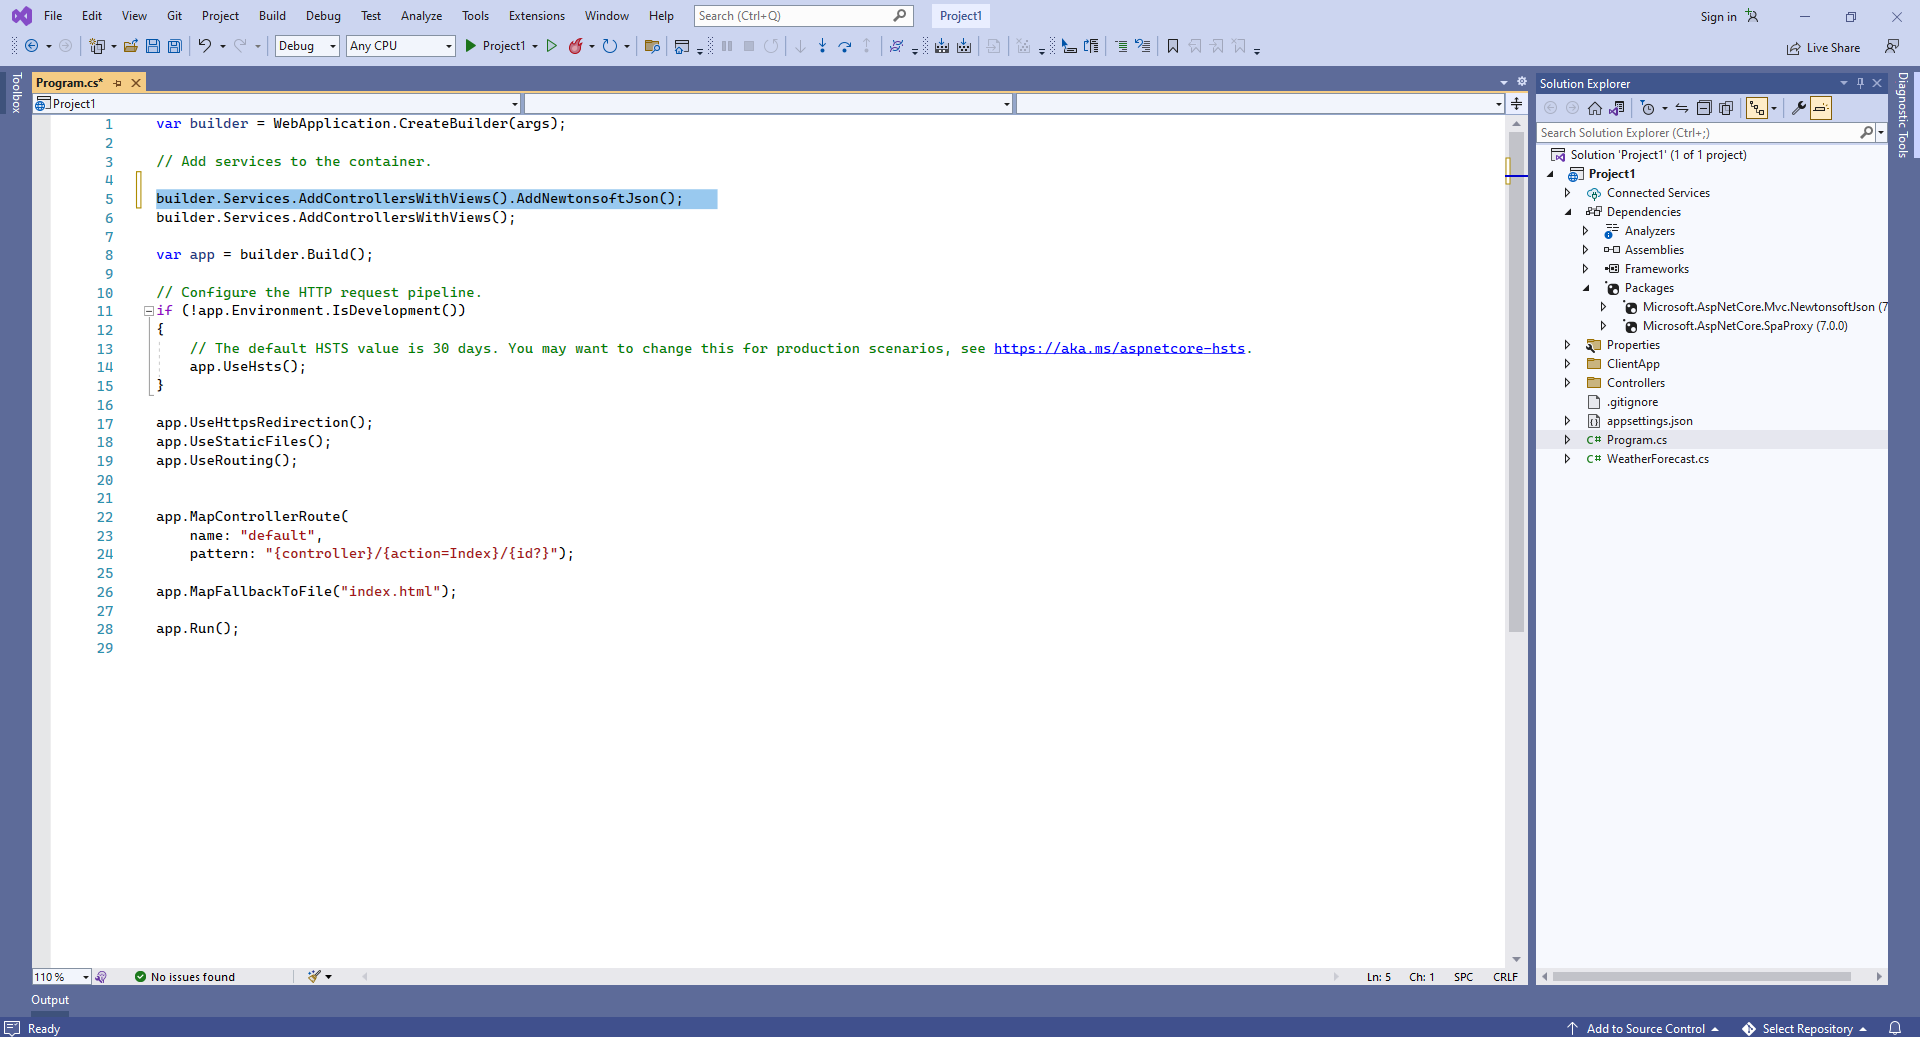
Here are source codes of Program.cs:
var builder = WebApplication.CreateBuilder(args);

// Add services to the container.

builder.Services.AddControllersWithViews().AddNewtonsoftJson();
builder.Services.AddControllersWithViews();

var app = builder.Build();

// Configure the HTTP request pipeline.
if (!app.Environment.IsDevelopment())
{
    // The default HSTS value is 30 days. You may want to change this for production scenarios, see https://aka.ms/aspnetcore-hsts.
    app.UseHsts();
}

app.UseHttpsRedirection();
app.UseStaticFiles();
app.UseRouting();


app.MapControllerRoute(
    name: "default",
    pattern: "{controller}/{action=Index}/{id?}");

app.MapFallbackToFile("index.html");

app.Run();
Compile the project for restoring dependencies using 'npm'.
-
Client side: Delete files, which are not necessary in this demo.
Delete files "ClientApp\src\components\Counter.js", "ClientApp\src\components\FetchData.js", "ClientApp\src\components\Home.js", "ClientApp\src\components\NavMenu.js", "ClientApp\src\components\NavMenu.css" - these React components are not necessary in this demo.
Delete files "WeatherForecast.cs" and "Controllers\WeatherForecastController.cs" - the WeatherForecast Web API controller is not necessary in this demo.

Open file "ClientApp\src\components\Layout.js" and delete lines "import { NavMenu } from './NavMenu';" and "<NavMenu />" - this demo does not need navigation menu.
Open file "ClientApp\src\App.js" and delete code that uses the following React components: Home, FetchData, Counter - these React components are not necessary in this demo.
Here are source codes of "App.js" file after update:
import React, { Component } from 'react';
import { Route } from 'react-router';
import { Layout } from './components/Layout';

import './custom.css'

export default class App extends Component {
  static displayName = App.name;

  render () {
    return (
      <Layout>
      </Layout>
    );
  }
}
-
Client side: Add JavaScript files to the ASP.NET Core Web application.
-
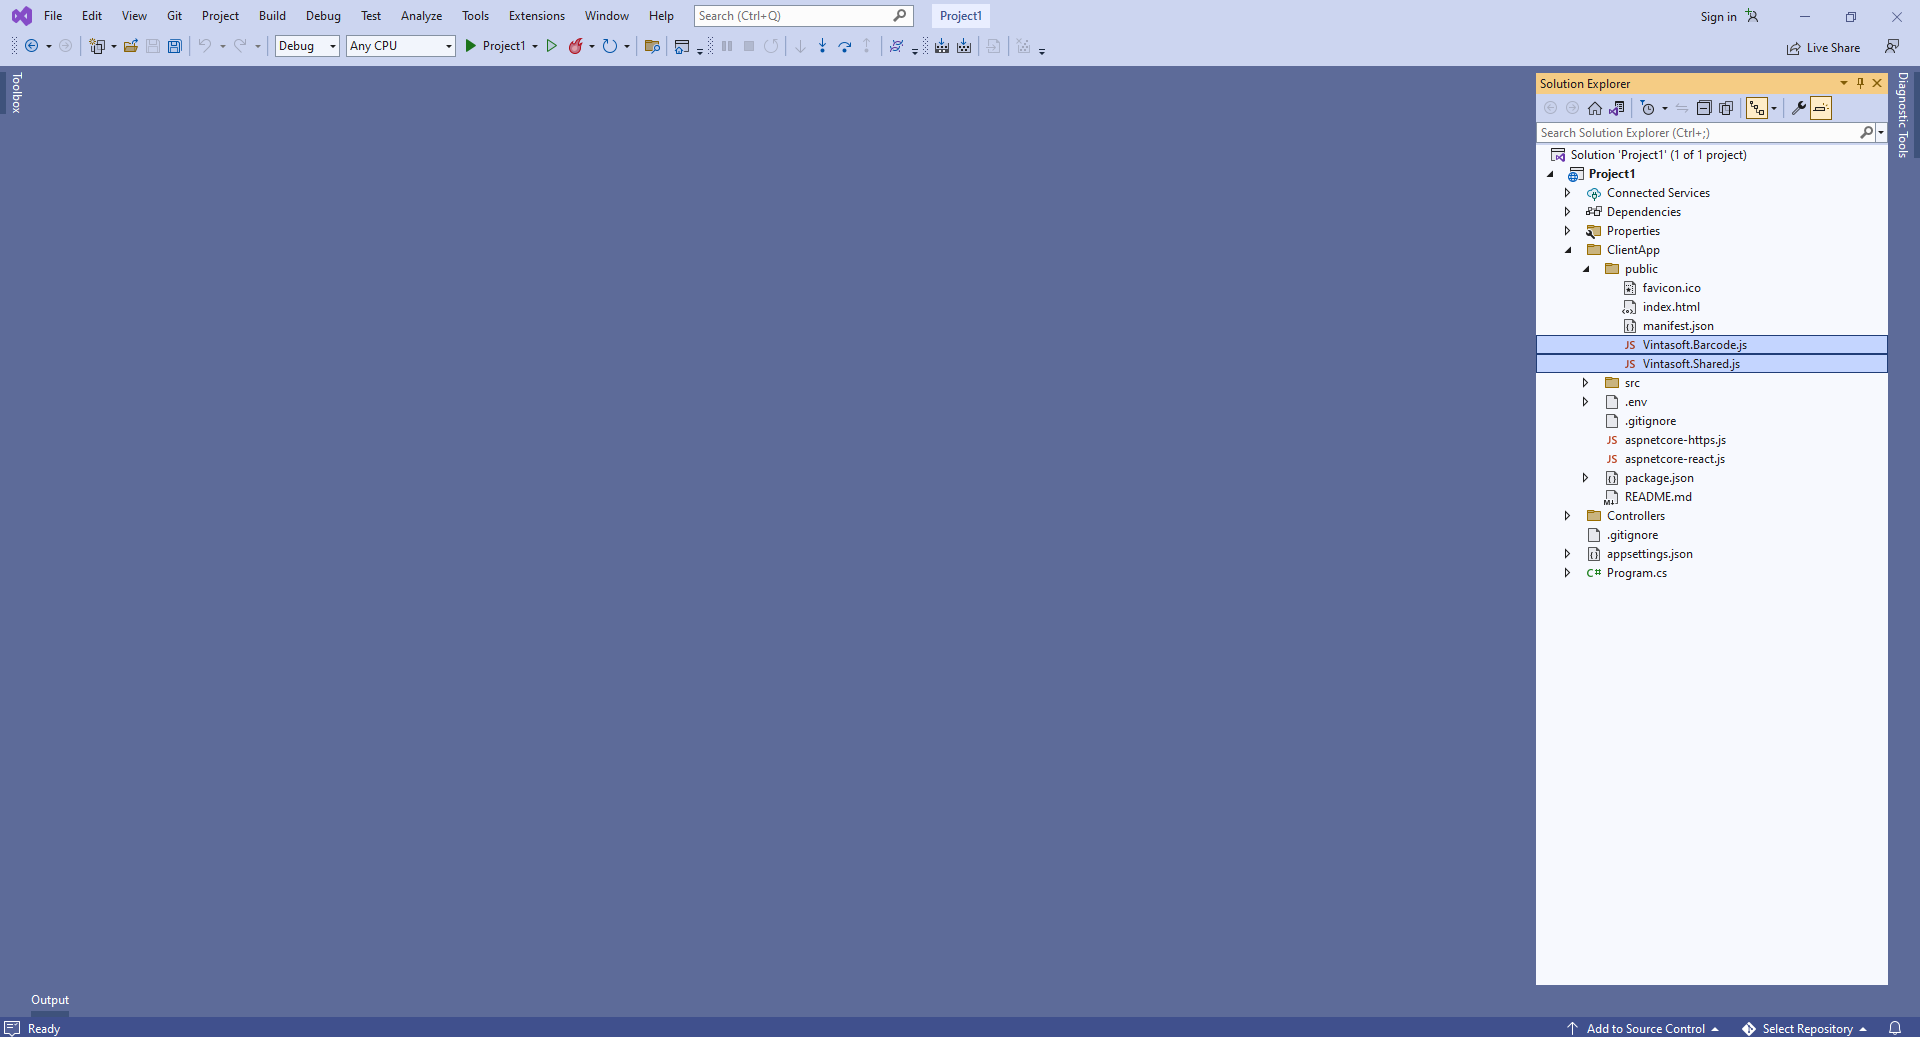
Copy Vintasoft.Shared.js and Vintasoft.Barcode.js files from "<InstallPath>\VintaSoft Barcode .NET 15.3\Bin\JavaScript\" folder into the "ClientApp\public\" folder.
-
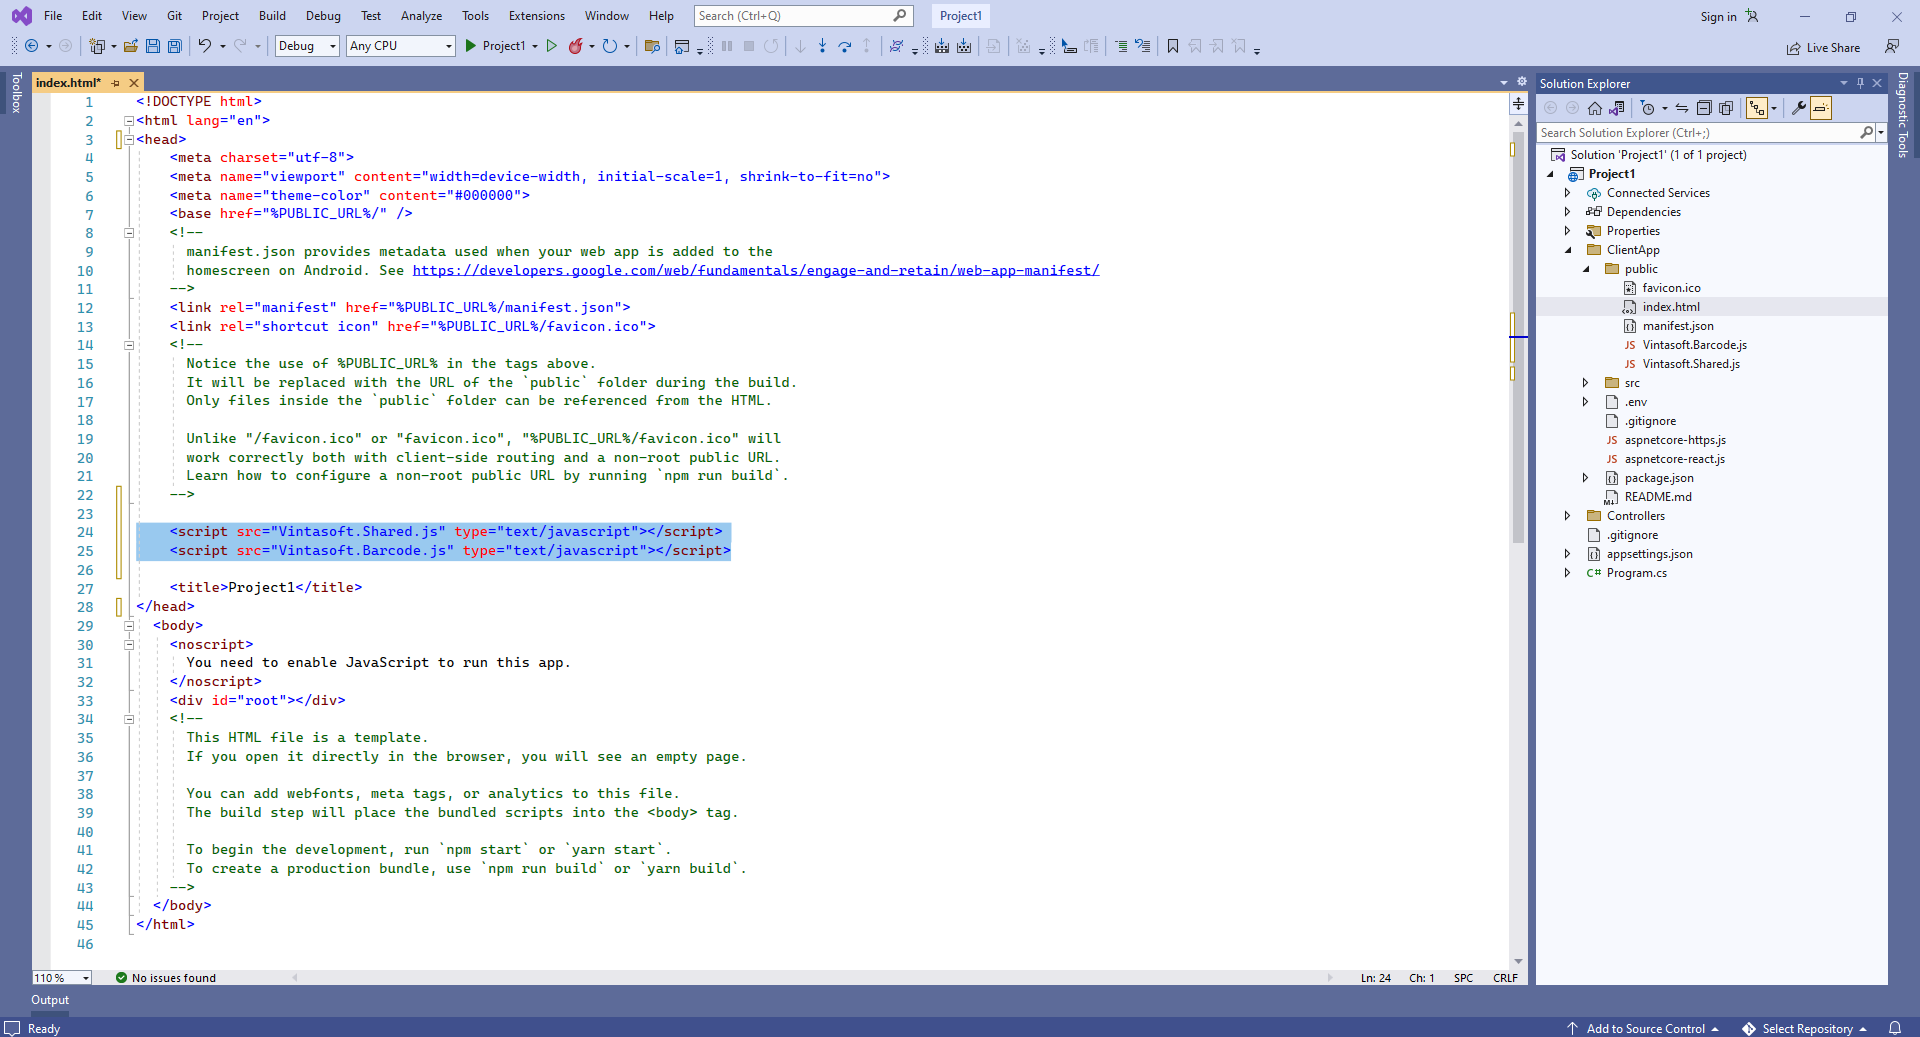
Add references to Vintasoft JavaScript files to the header of "ClientApp\public\index.html" file:
<!DOCTYPE html>
<html lang="en">
<head>
    <meta charset="utf-8">
    <meta name="viewport" content="width=device-width, initial-scale=1, shrink-to-fit=no">
    <meta name="theme-color" content="#000000">
    <base href="%PUBLIC_URL%/" />
    <!--
      manifest.json provides metadata used when your web app is added to the
      homescreen on Android. See https://developers.google.com/web/fundamentals/engage-and-retain/web-app-manifest/
-->
    <link rel="manifest" href="%PUBLIC_URL%/manifest.json">
    <link rel="shortcut icon" href="%PUBLIC_URL%/favicon.ico">
    <!--
      Notice the use of %PUBLIC_URL% in the tags above.
      It will be replaced with the URL of the `public` folder during the build.
      Only files inside the `public` folder can be referenced from the HTML.

      Unlike "/favicon.ico" or "favicon.ico", "%PUBLIC_URL%/favicon.ico" will
      work correctly both with client-side routing and a non-root public URL.
      Learn how to configure a non-root public URL by running `npm run build`.
-->

    <script src="Vintasoft.Shared.js" type="text/javascript"></script>
    <script src="Vintasoft.Barcode.js" type="text/javascript"></script>

    <title>WebApplication1</title>
</head>
  <body>
    <noscript>
      You need to enable JavaScript to run this app.
    </noscript>
    <div id="root"></div>
    <!--
      This HTML file is a template.
      If you open it directly in the browser, you will see an empty page.

      You can add webfonts, meta tags, or analytics to this file.
      The build step will place the bundled scripts into the <body> tag.

      To begin the development, run `npm start` or `yarn start`.
      To create a production bundle, use `npm run build` or `yarn build`.
-->
  </body>
</html>
-
Client side: Create React.js component that recognize barcodes in image and displays barcode recognition result.
-
Create folder "wwwroot\UploadedImageFiles\SessionID" and copy image file with barcodes "<InstallPath>VintaSoft\Barcode .NET 15.3\Images\AllSupportedBarcodes.png" to the folder. We will recognize barcodes in this image.
-
Create "BarcodeReaderDemo.js" file that will contain source codes of React.js component (BarcodeReaderDemo class):
- Select "Add => New Item..." context menu for folder "ClientApp\src\components\" => "Add new item" dialog will appear
- Select "JavaScript File" type for new item
- Set "BarcodeReaderDemo.js" as element name
- Click the "Add" button => dialog will be closed and file "BarcodeReaderDemo.js" will be added into folder "ClientApp\src\components\"
Add BarcodeReaderDemo class declaration with 'render' function (renders demo header and div element that will display barcode recognition result) to the "BarcodeReaderDemo.js" file:
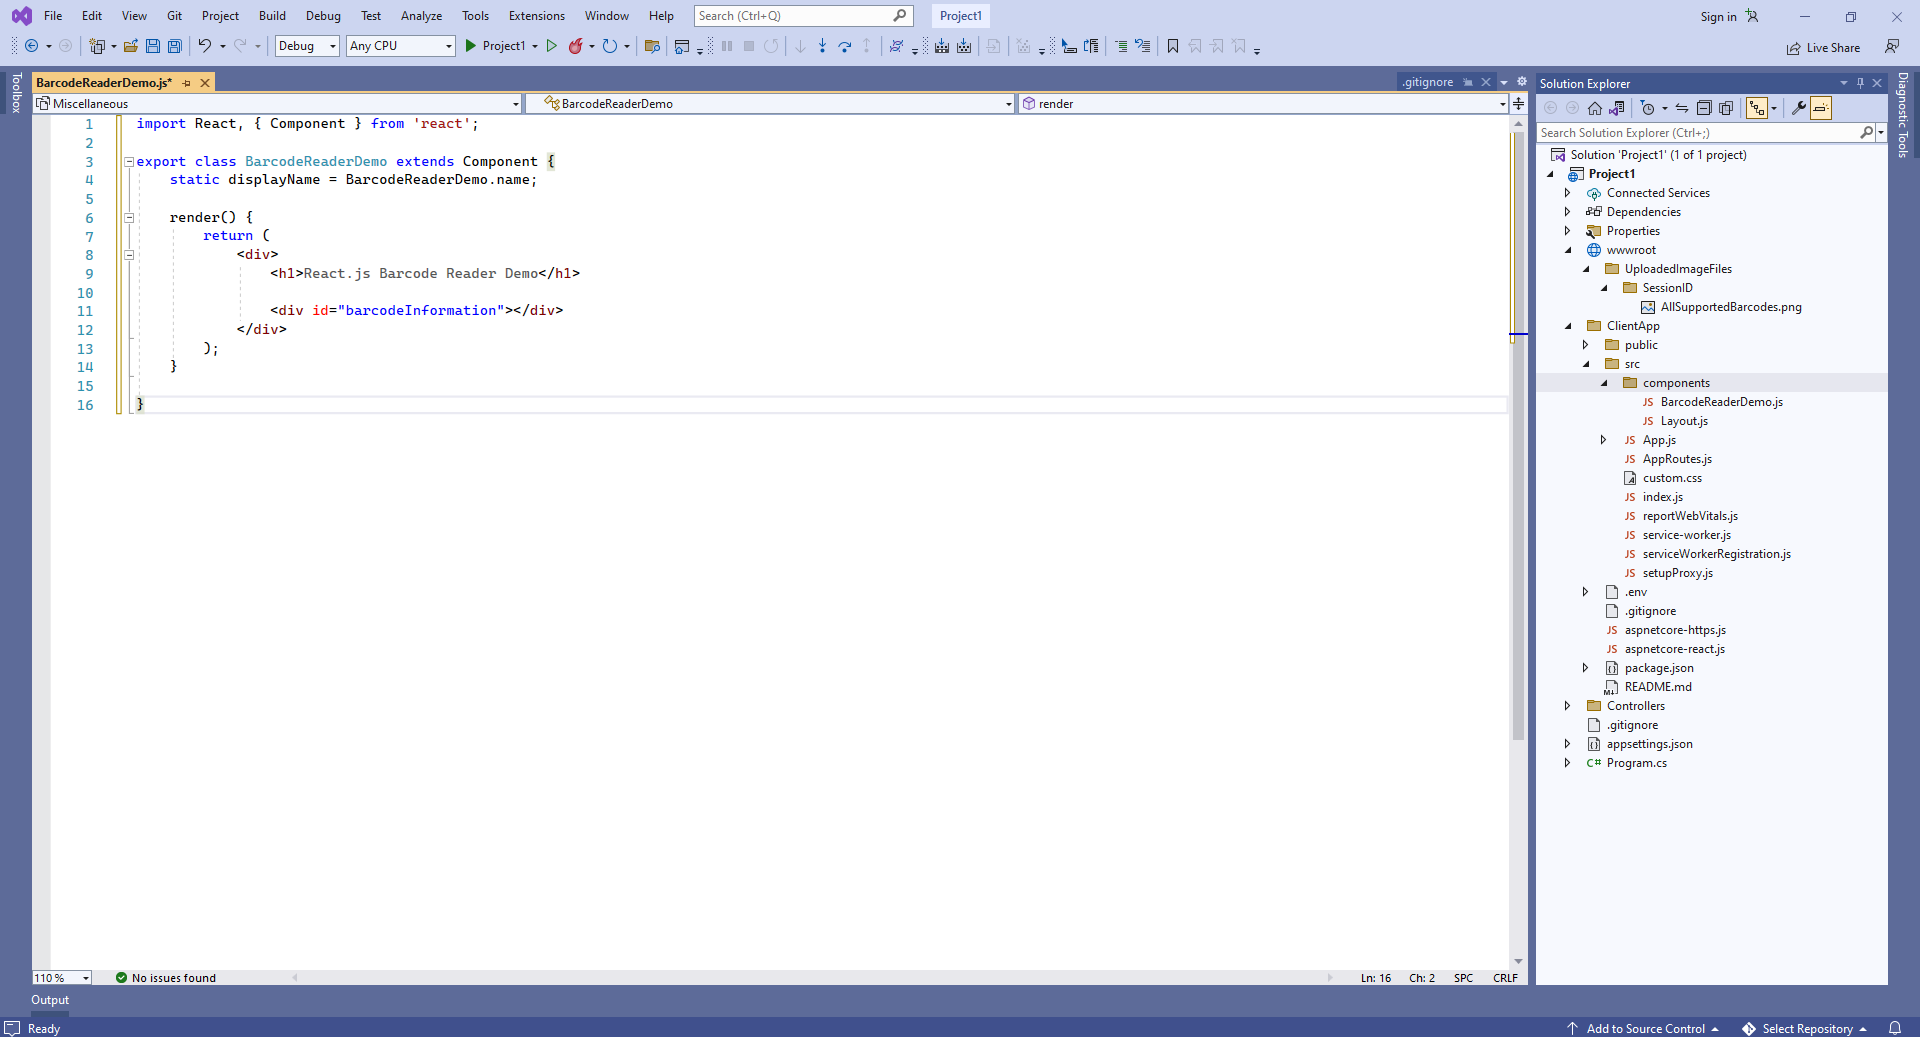
Add 'componentDidMount' function (contains JavaScript code that recognize barcodes in image and displays barcode recognition result) to the BarcodeReaderDemo class:
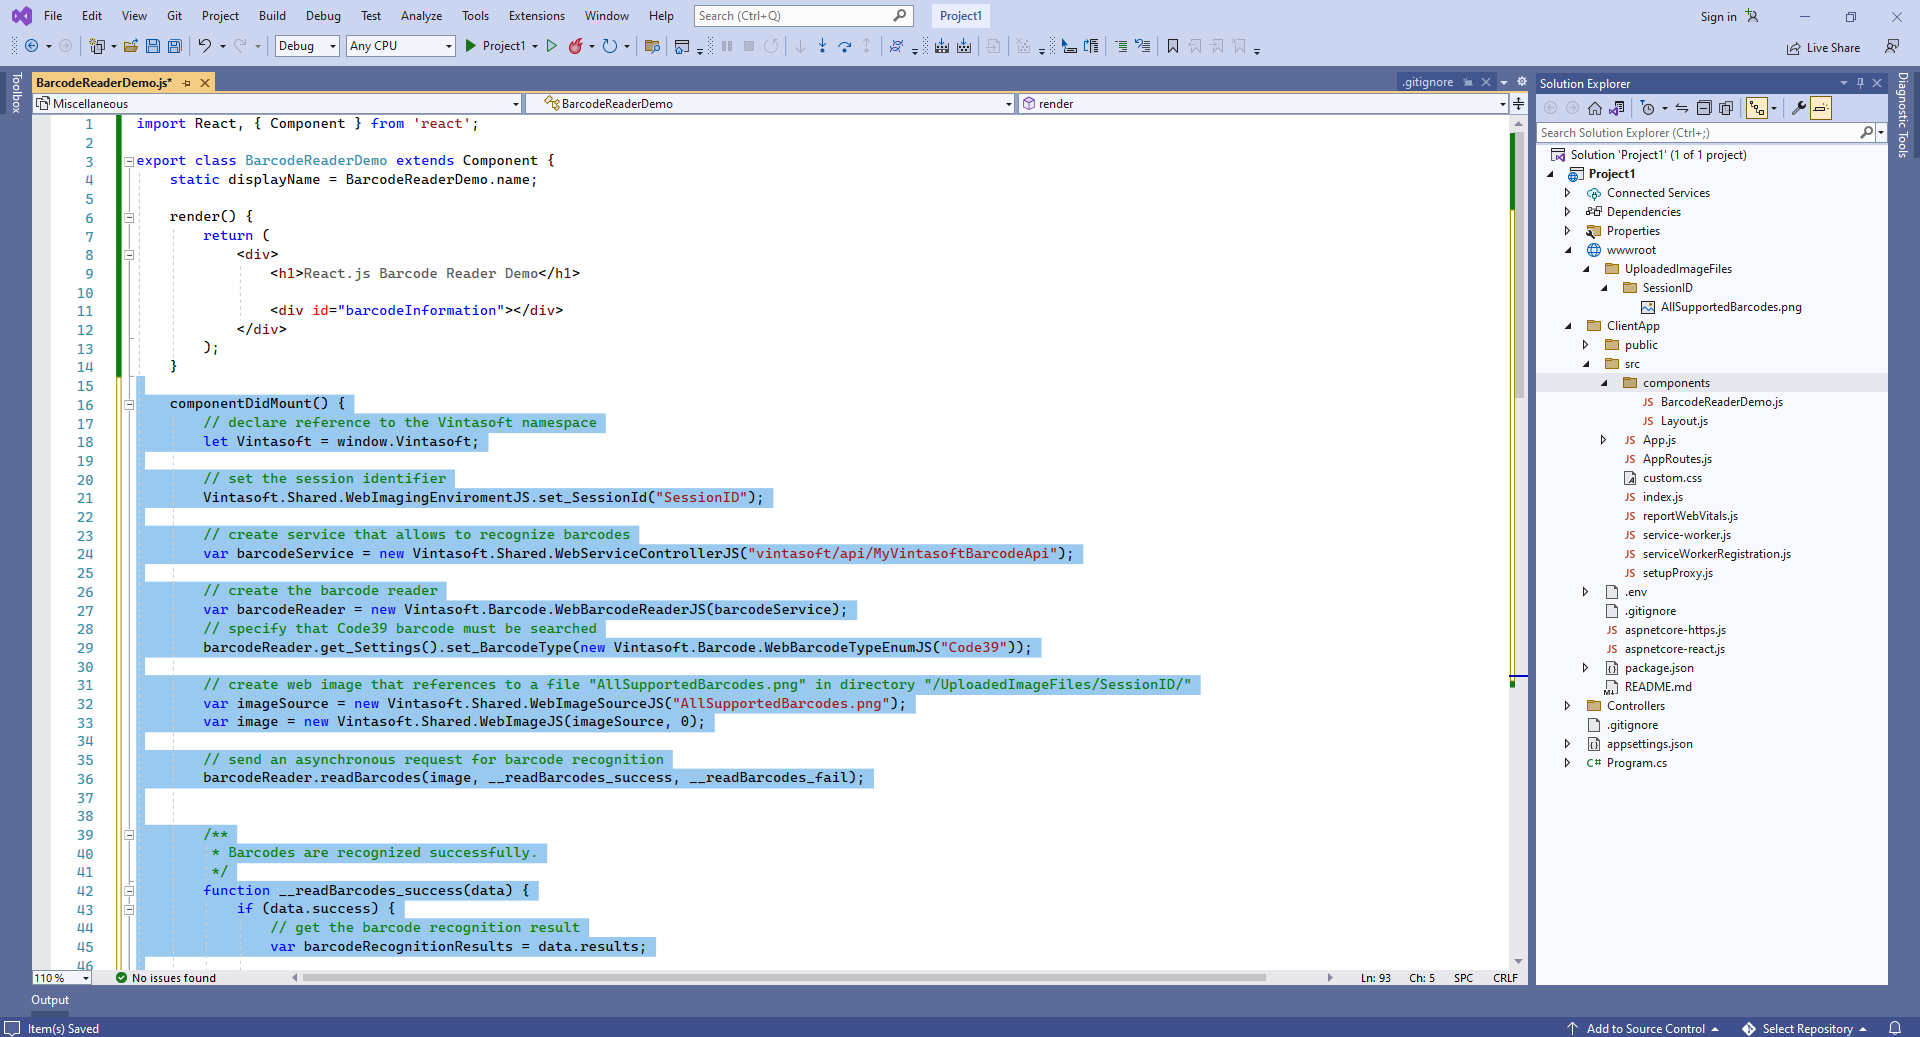
Here is JavaScript code of React.js component (BarcodeReaderDemo class):
import React, { Component } from 'react';

export class BarcodeReaderDemo extends Component {
    static displayName = BarcodeReaderDemo.name;

    render() {
        return (
            <div>
                <h1>React.js Barcode Reader Demo</h1>

                <div id="barcodeInformation"></div>
            </div>
        );
    }

    componentDidMount() {
        // declare reference to the Vintasoft namespace
        let Vintasoft = window.Vintasoft;

        // set the session identifier
        Vintasoft.Shared.WebImagingEnviromentJS.set_SessionId("SessionID");

        // create service that allows to recognize barcodes
        var barcodeService = new Vintasoft.Shared.WebServiceControllerJS("vintasoft/api/MyVintasoftBarcodeApi");

        // create the barcode reader
        var barcodeReader = new Vintasoft.Barcode.WebBarcodeReaderJS(barcodeService);
        // specify that Code39 barcode must be searched
        barcodeReader.get_Settings().set_BarcodeType(new Vintasoft.Barcode.WebBarcodeTypeEnumJS("Code39"));

        // create web image that references to a file "AllSupportedBarcodes.png" in directory "/UploadedImageFiles/SessionID/"
        var imageSource = new Vintasoft.Shared.WebImageSourceJS("AllSupportedBarcodes.png");
        var image = new Vintasoft.Shared.WebImageJS(imageSource, 0);

        // send an asynchronous request for barcode recognition
        barcodeReader.readBarcodes(image, __readBarcodes_success, __readBarcodes_fail);


        /**
         * Barcodes are recognized successfully.
         */
        function __readBarcodes_success(data) {
            if (data.success) {
                // get the barcode recognition result
                var barcodeRecognitionResults = data.results;

                var htmlMarkup = '';
                // if no barcodes found
                if (barcodeRecognitionResults.length == 0) {
                    htmlMarkup = 'No barcodes found.';
                }
                // if barcodes are found
                else {
                    htmlMarkup = barcodeRecognitionResults.length.toString() + ' barcodes are found.<br />';
                    htmlMarkup += '<br />';

                    // for each recognized barcode
                    for (var i = 0; i < barcodeRecognitionResults.length; i++) {
                        // get the barcode recognition result
                        var barcodeRecognitionResult = barcodeRecognitionResults[i];

                        // output information about recognized barcode
                        htmlMarkup += '[' + (i + 1) + ':' + barcodeRecognitionResult.barcodeType + ']<br />';
                        htmlMarkup += '  Value: ' + barcodeRecognitionResult.value + '<br />';
                        htmlMarkup += '  Confidence: ' + barcodeRecognitionResult.confidence + '<br />';
                        htmlMarkup += '  Reading quality: ' + barcodeRecognitionResult.readingQuality.toFixed(2) + '<br />';
                        htmlMarkup += '  Threshold: ' + barcodeRecognitionResult.threshold + '<br />';
                        htmlMarkup += '  Region: ' +
                            'LT=(' + barcodeRecognitionResult.region.leftTop.x + ',' + barcodeRecognitionResult.region.leftTop.y + '); ' +
                            'RT=(' + barcodeRecognitionResult.region.rightTop.x + ',' + barcodeRecognitionResult.region.rightTop.y + '); ' +
                            'LB=(' + barcodeRecognitionResult.region.leftBottom.x + ',' + barcodeRecognitionResult.region.leftBottom.y + '); ' +
                            'RB=(' + barcodeRecognitionResult.region.rightBottom.x + ',' + barcodeRecognitionResult.region.rightBottom.y + '); ' +
                            'Angle=' + barcodeRecognitionResult.region.angle.toFixed(1) + '°<br />';

                        htmlMarkup += '<br />';
                    }
                }

                var barcodeInformationElement = document.getElementById("barcodeInformation");
                barcodeInformationElement.innerHTML = htmlMarkup;
            }
        }

        /**
         * Barcode recognition is failed.
         */
        function __readBarcodes_fail(data) {
            // show information about error
            alert(data.errorMessage);
        }

    }

}
-
Add created React.js component to the React.js application code - "ClientApp\src\App.js" file.
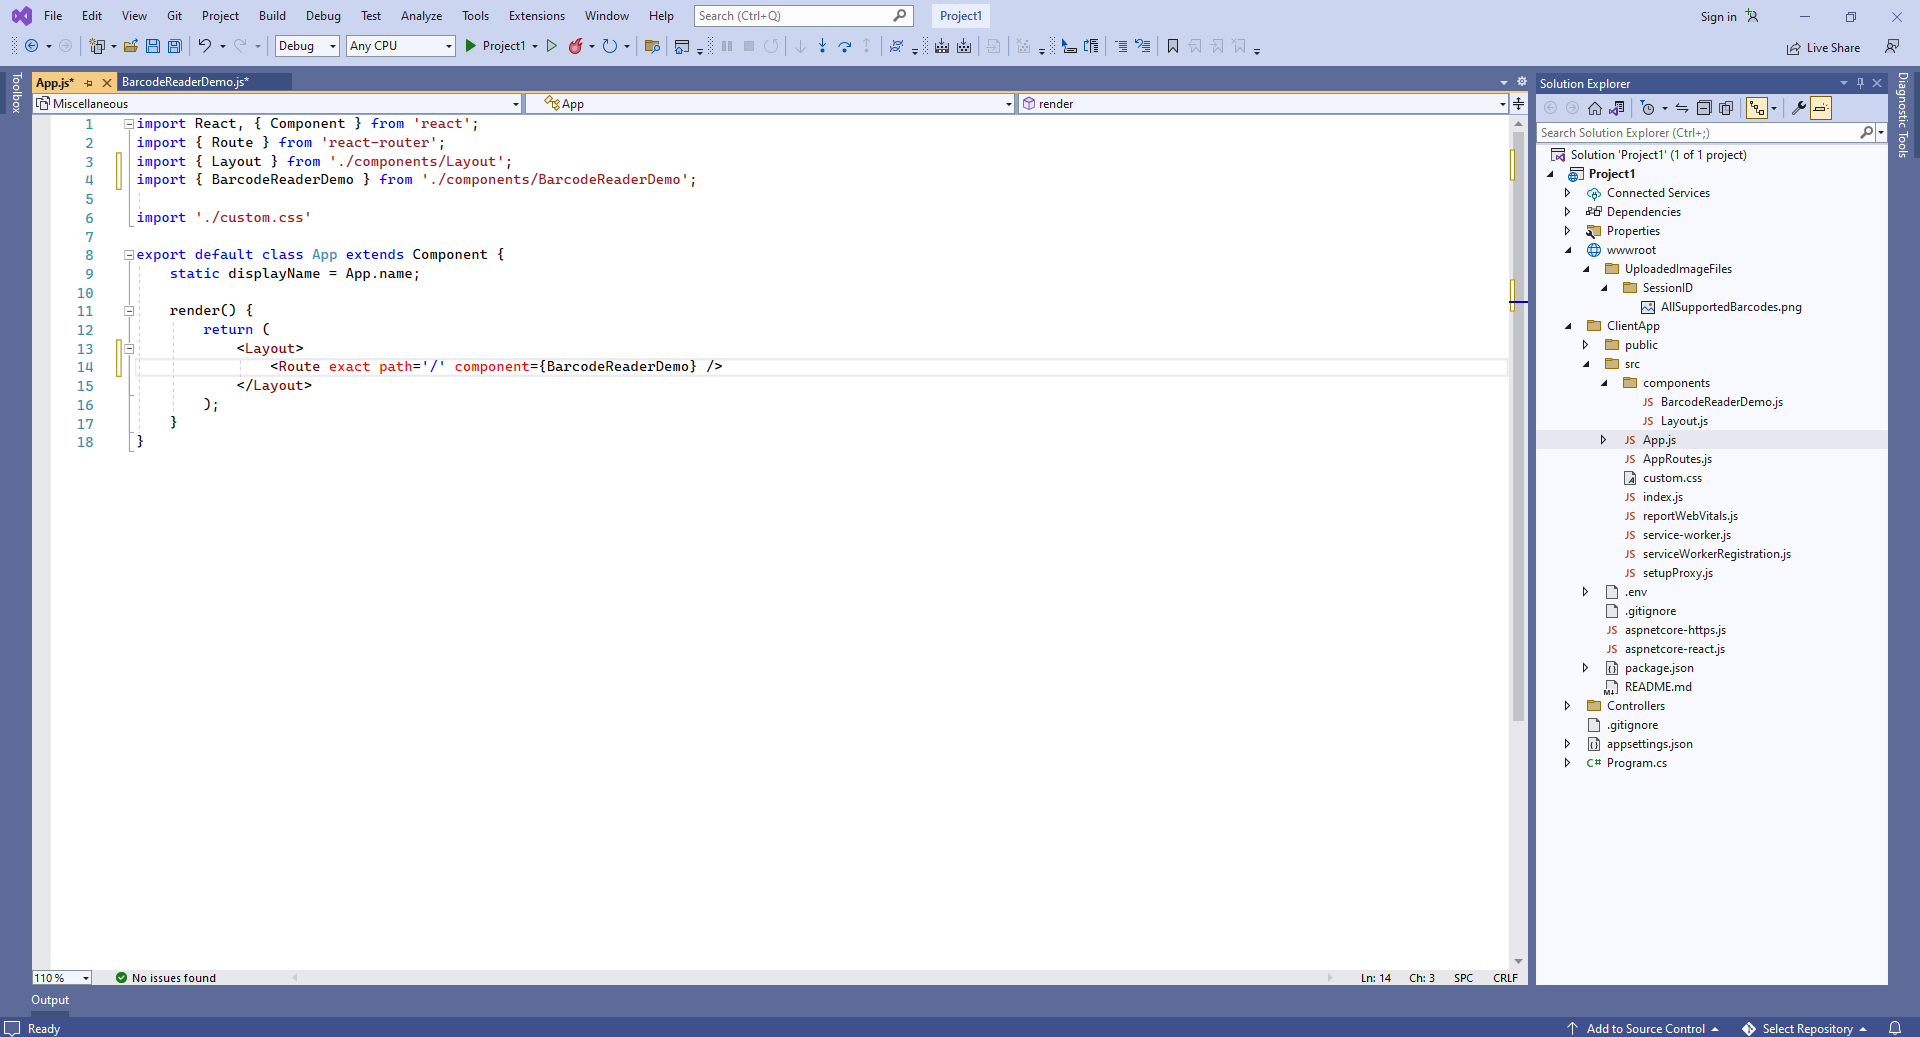
Here are source codes of "App.js" file after update:
import React, { Component } from 'react';
import { Route } from 'react-router';
import { Layout } from './components/Layout';
import { BarcodeReaderDemo } from './components/BarcodeReaderDemo';

import './custom.css'

export default class App extends Component {
    static displayName = App.name;

    render() {
        return (
            <Layout>
                <Route exact path='/' component={BarcodeReaderDemo} />
            </Layout>
        );
    }
}
-
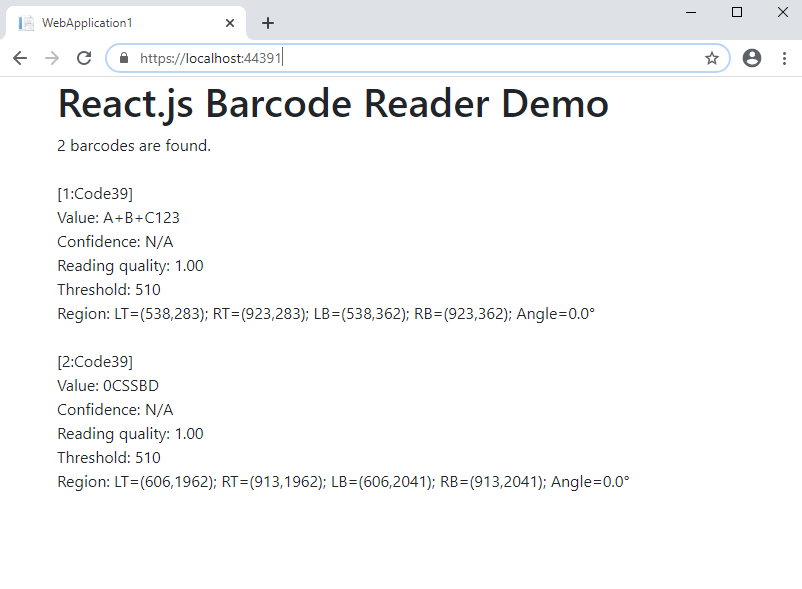
Run the ASP.NET Core Web application with React.js and see the result.
