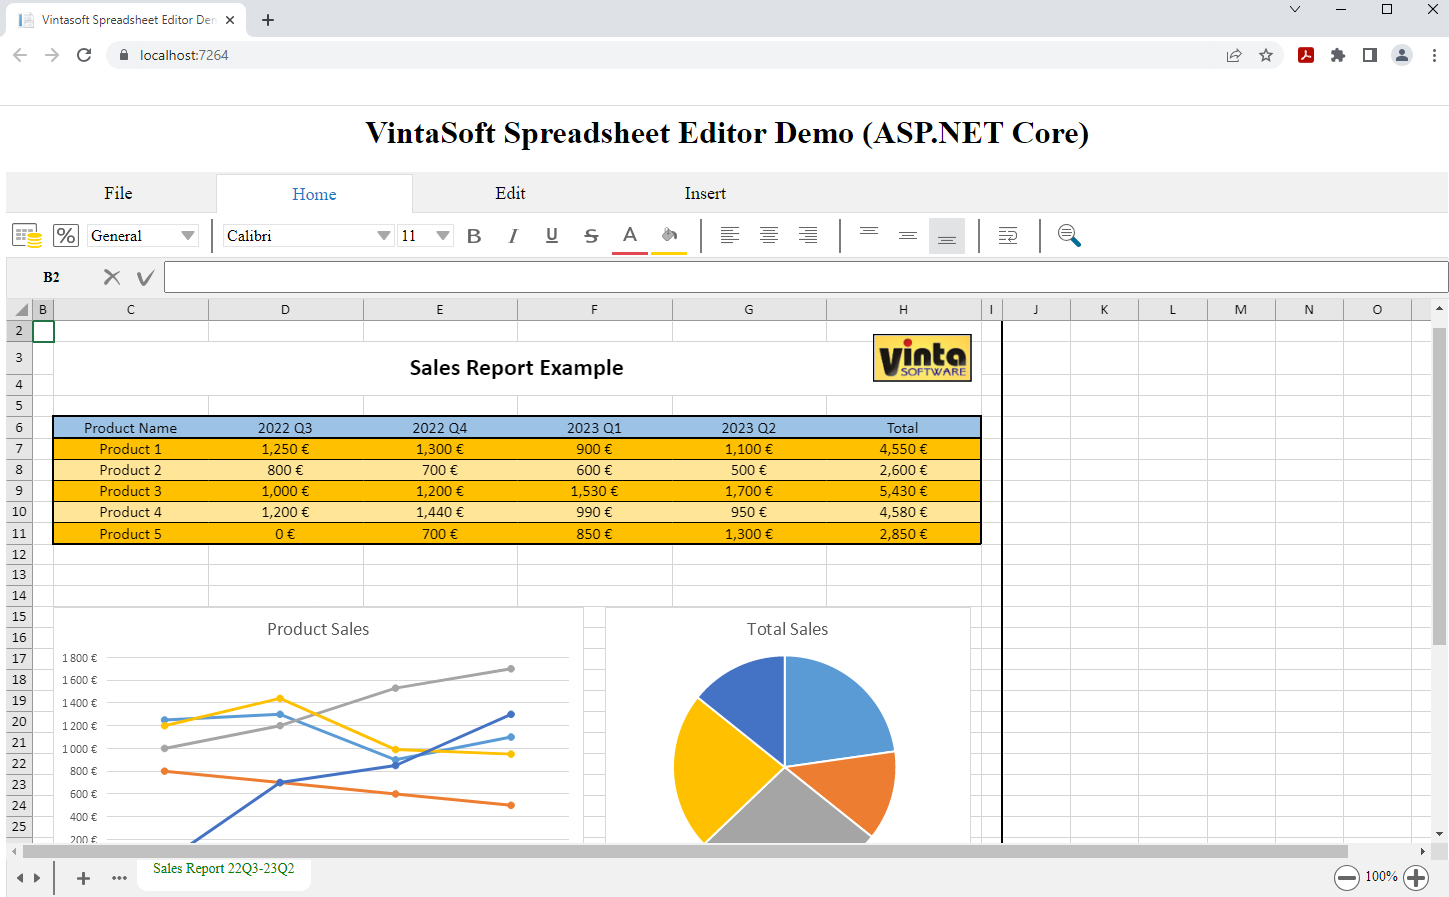
Add web spreadsheet document editor to an "ASP.NET Core Web App (Model-View-Controller)" application
In This Topic
This tutorial shows how to create a blank "ASP.NET Core Web App (Model-View-Controller)" application in Visual Studio .NET 2026 and add the spreadsheet document editor (with ability to open, edit and save spreadsheet document (XLSX)) to ASP.NET Core application.
Here are steps, which must be done:
-
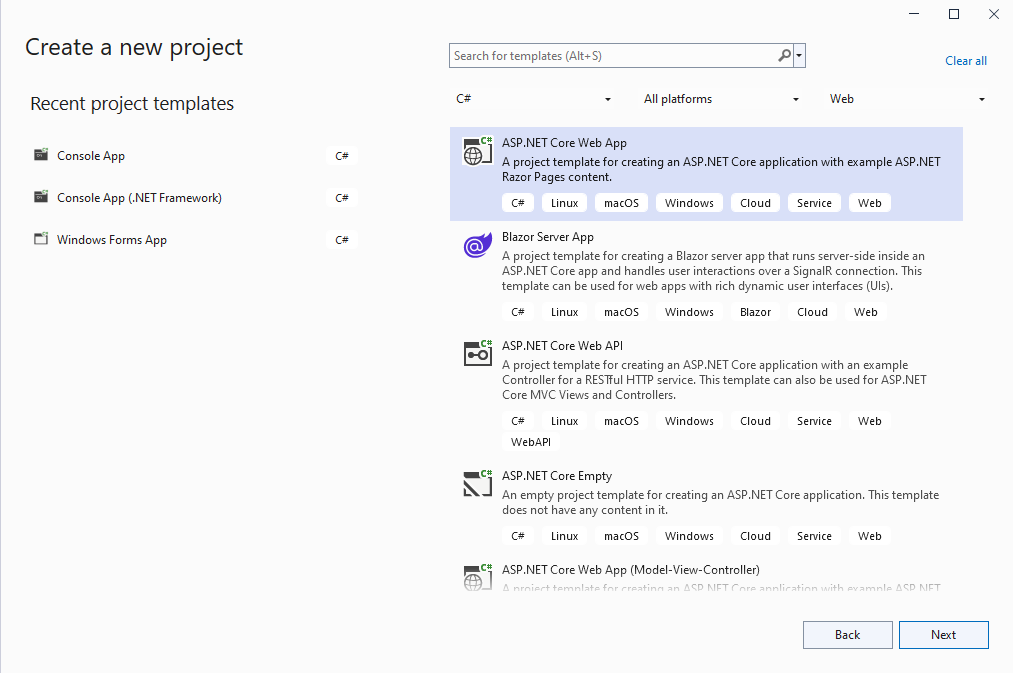
Create a blank "ASP.NET Core Web App (Model-View-Controller)" application.
Open Visual Studio .NET 2026 and create a new project, of "ASP.NET Core Web App (Model-View-Controller)" application type:
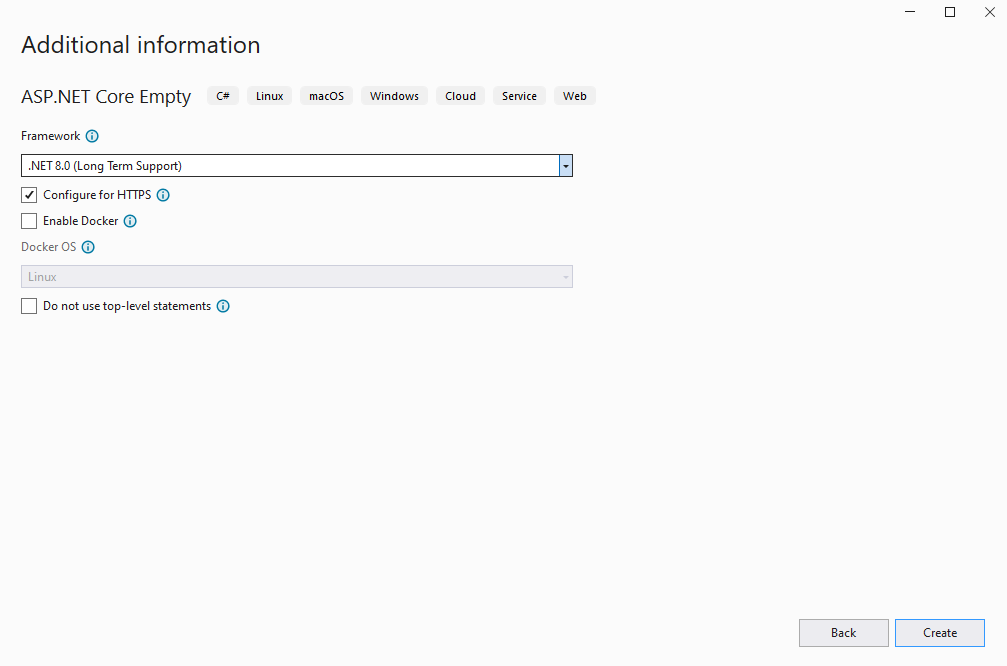
Configure the project to use .NET 10.0:
-
Server side: Add references to the Vintasoft nuget-packages to the ASP.NET Core application.
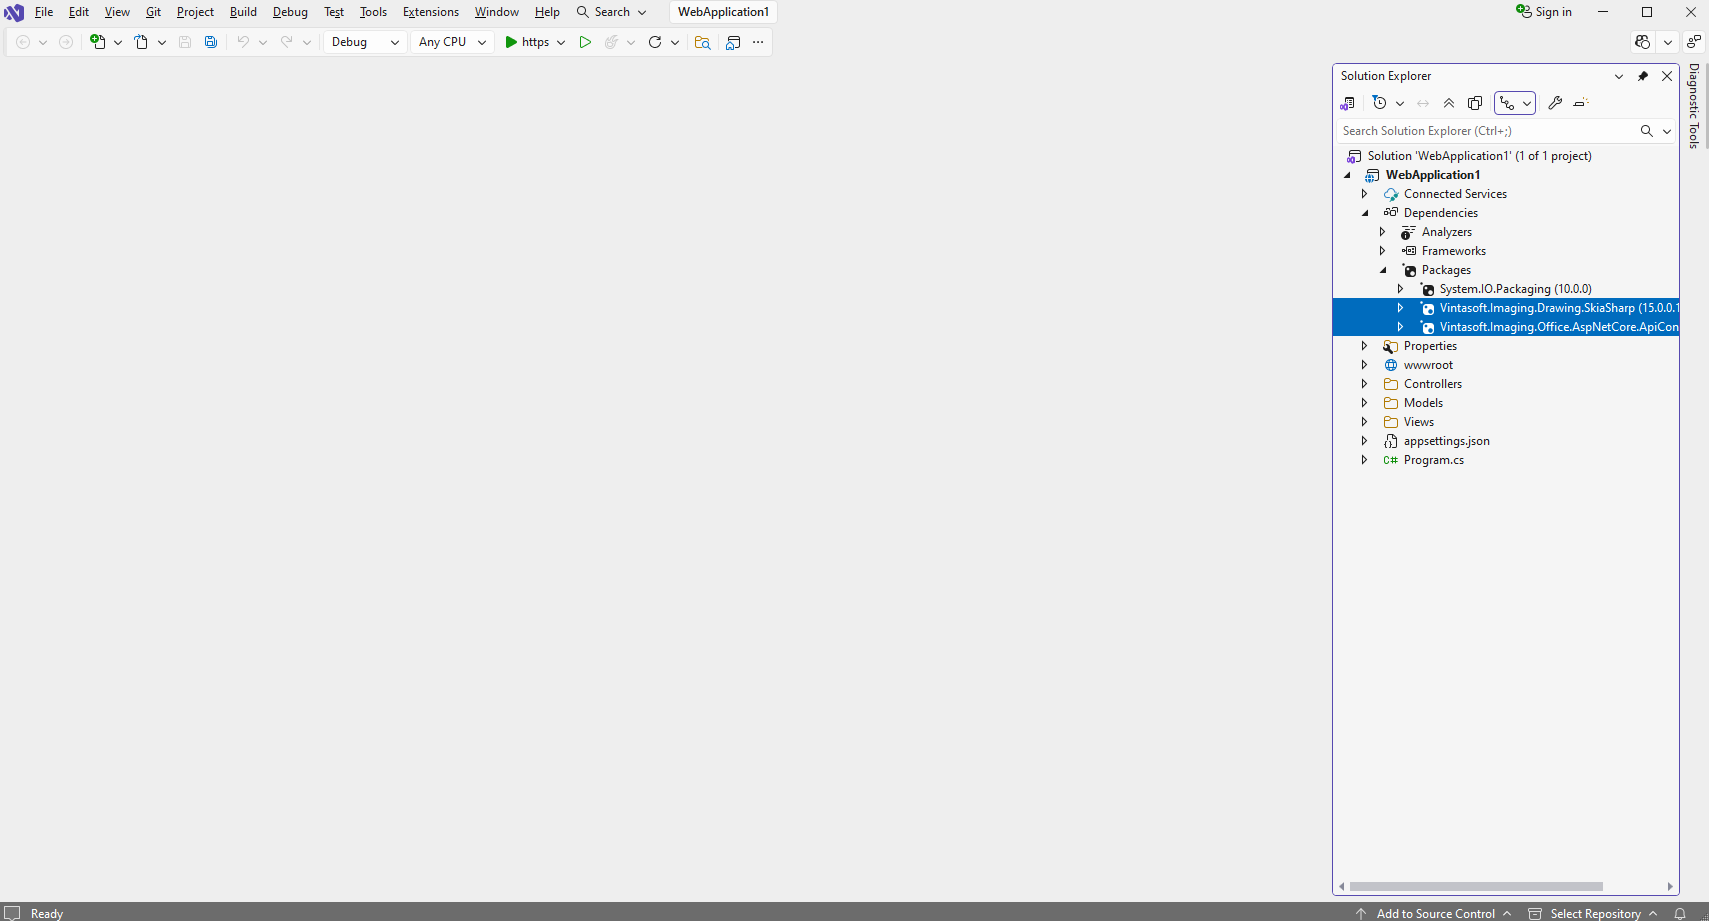
Add reference to the nuget-package "Vintasoft.Imaging.Office.AspNetCore.ApiControllers" to the ASP.NET Core application. Other necessary nuget-packages will be added automatically.
-
Server side: Specify drawing engine, which should be used by VintaSoft Imaging .NET SDK for drawing of 2D graphics.
If ASP.NET application must be used in Windows or Linux, SkiaSharp drawing engine should be used.
If ASP.NET application must be used in Windows only, System.Drawing or SkiaSharp drawing engine should be used.
Here are steps, which should be made for using SkiaSharp engine:-
Add reference to the "Vintasoft.Imaging.Drawing.SkiaSharp" nuget-package. Reference to the "SkiaSharp" nuget-package version 3.119.0 will be added automatically.
- Open "Program.cs" file, add code line "Vintasoft.Imaging.Drawing.SkiaSharp.SkiaSharpDrawingFactory.SetAsDefault();" at the beginning of file - added code specifies that VintaSoft Imaging .NET SDK should use SkiaSharp library for drawing of 2D graphics.
Here are steps, which should be made for using System.Drawing engine:-
Add reference to the "Vintasoft.Imaging.Gdi" nuget-package.
- Open "Program.cs" file, add code line "Vintasoft.Imaging.Drawing.Gdi.GdiGraphicsFactory.SetAsDefault();" at the beginning of file - added code specifies that VintaSoft Imaging .NET SDK should use System.Drawing library for drawing of 2D graphics.
-
Add reference to the "Vintasoft.Imaging.Drawing.SkiaSharp" nuget-package. Reference to the "SkiaSharp" nuget-package version 3.119.0 will be added automatically.
-
Server side: Add reference to nuget-packages.
- Add reference to the "System.IO.Packaging" nuget-package version 10.0.0.
-
Server side: Define XLSX file that contains templates for new charts.
- Create "wwwroot\Resources\" folder.
-
Download "ChartSource.xlsx" file from Github and place downloaded file into "wwwroot\Resources\" folder.
The "ChartSource.xlsx" file contains worksheets with charts, which are used as templates for adding charts. You can modify this file or use your own file with charts.
-
Server side: Create web services, which allow to upload/download file and manage Office documents.
- Add the "Controllers" folder to the project.
-
Create web service that allows to upload/download file
-
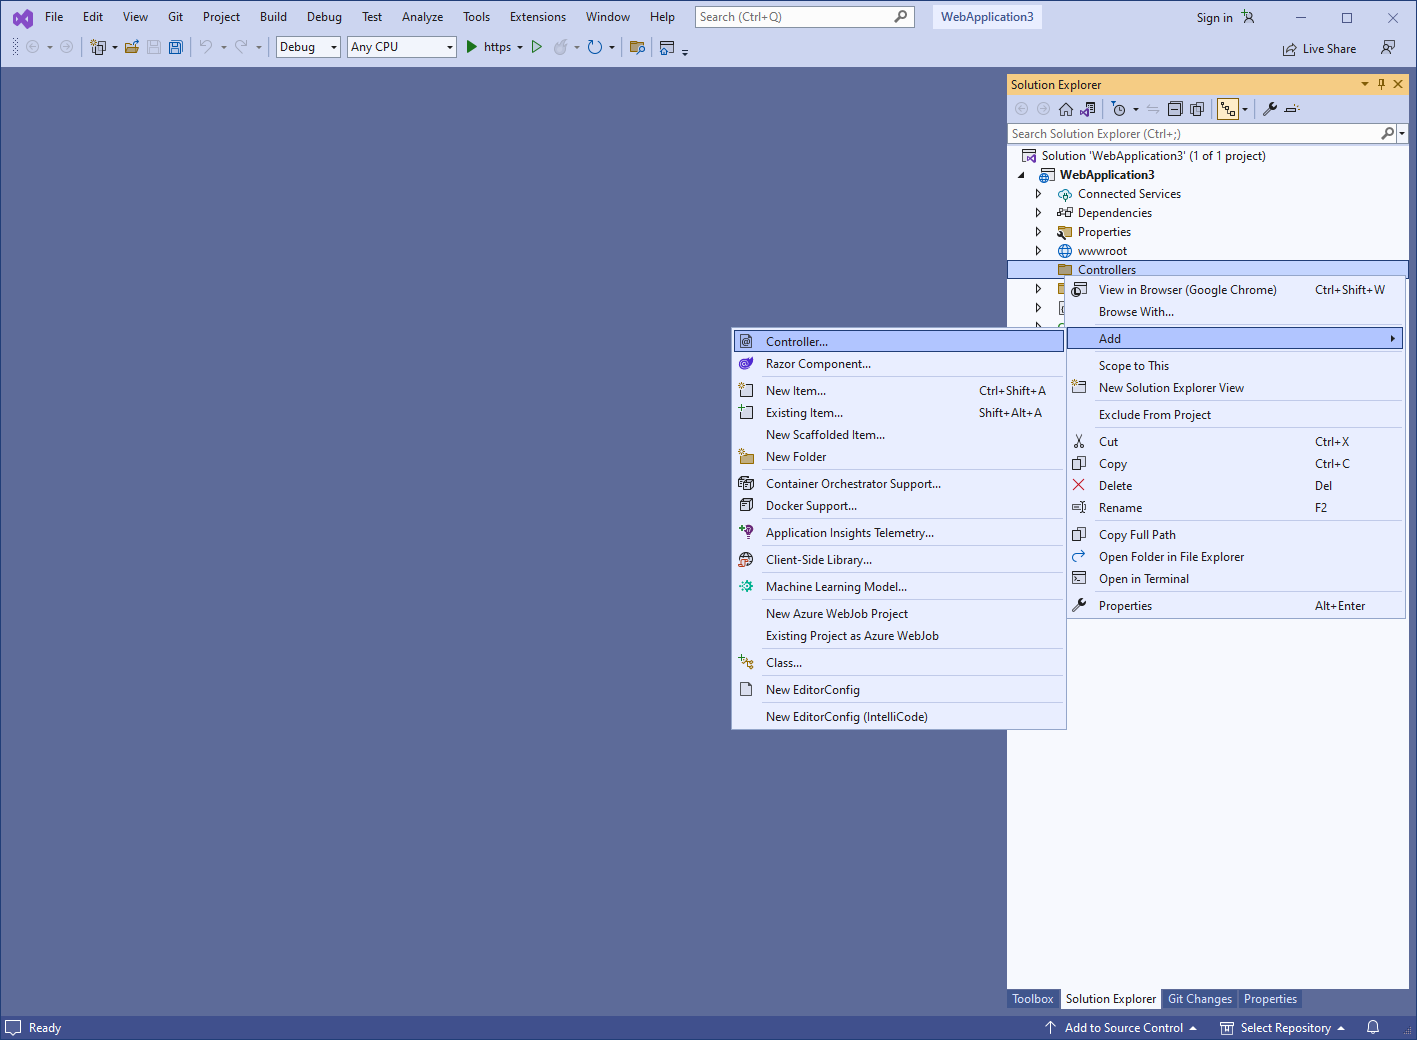
Press the right mouse button on the "Controllers" folder and select the "Add => Controller..." menu from context menu
-
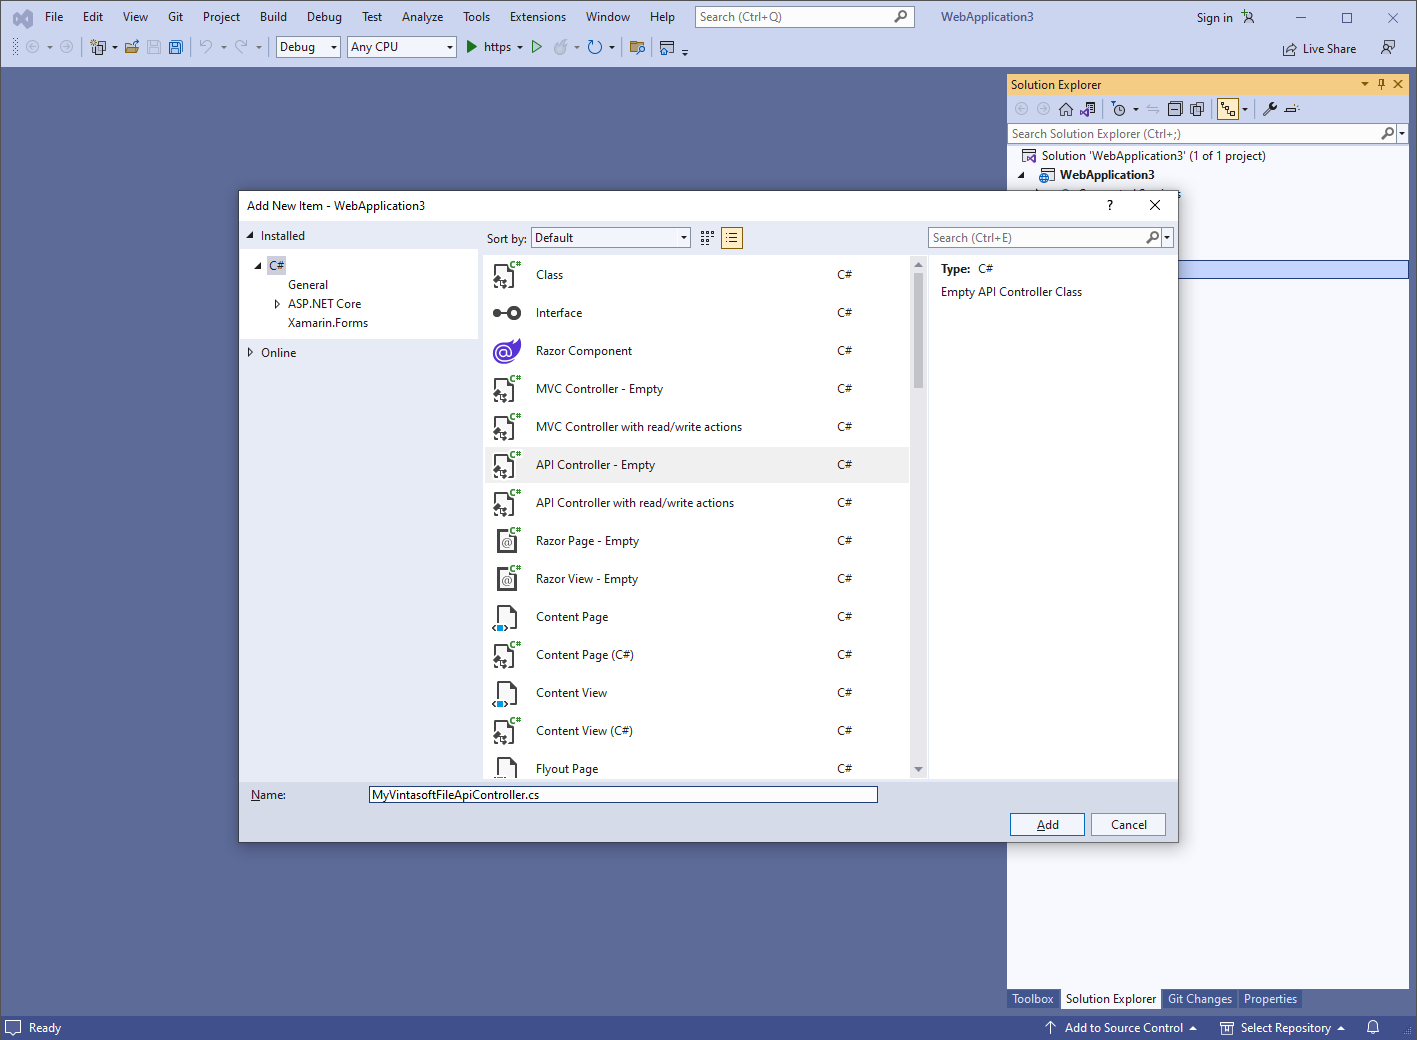
Select "Empty API controller" template, set the controller name to the "MyVintasoftFileApiController" and press the "Add" button
-
Specify that MyVintasoftFileApiController class is derived from Vintasoft.Imaging.AspNetCore.ApiControllers.VintasoftFileApiController class
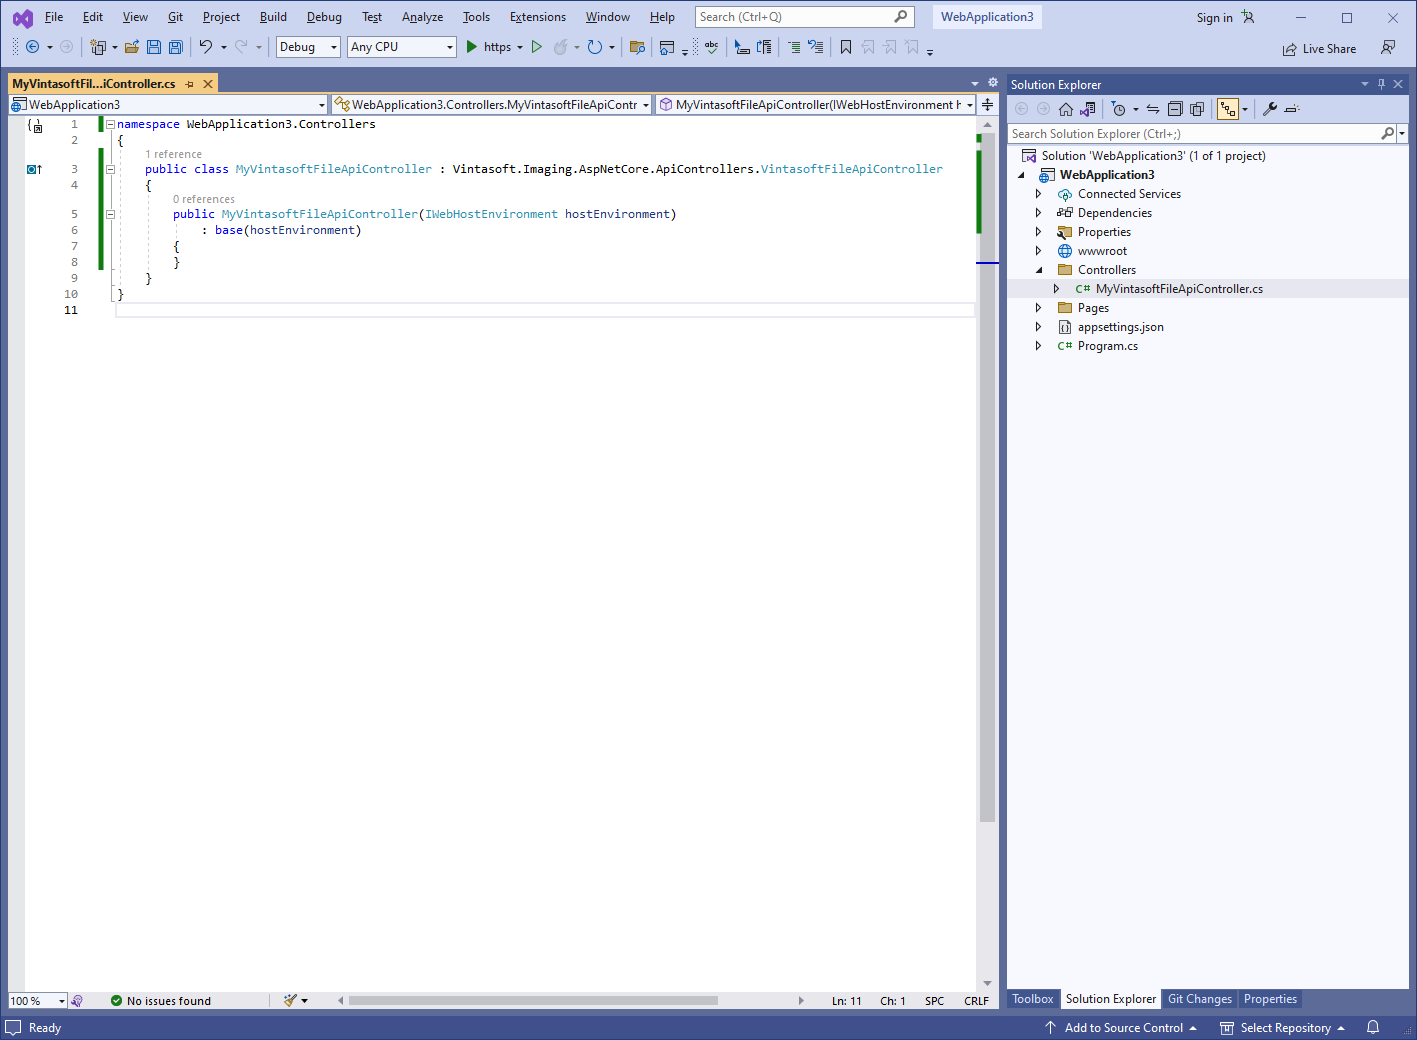
Here are source codes of MyVintasoftFileApiController class:
-
Press the right mouse button on the "Controllers" folder and select the "Add => Controller..." menu from context menu
-
Create web service that allows to manage Office documents
-
Press the right mouse button on the "Controllers" folder and select the "Add => Controller..." menu from context menu
-
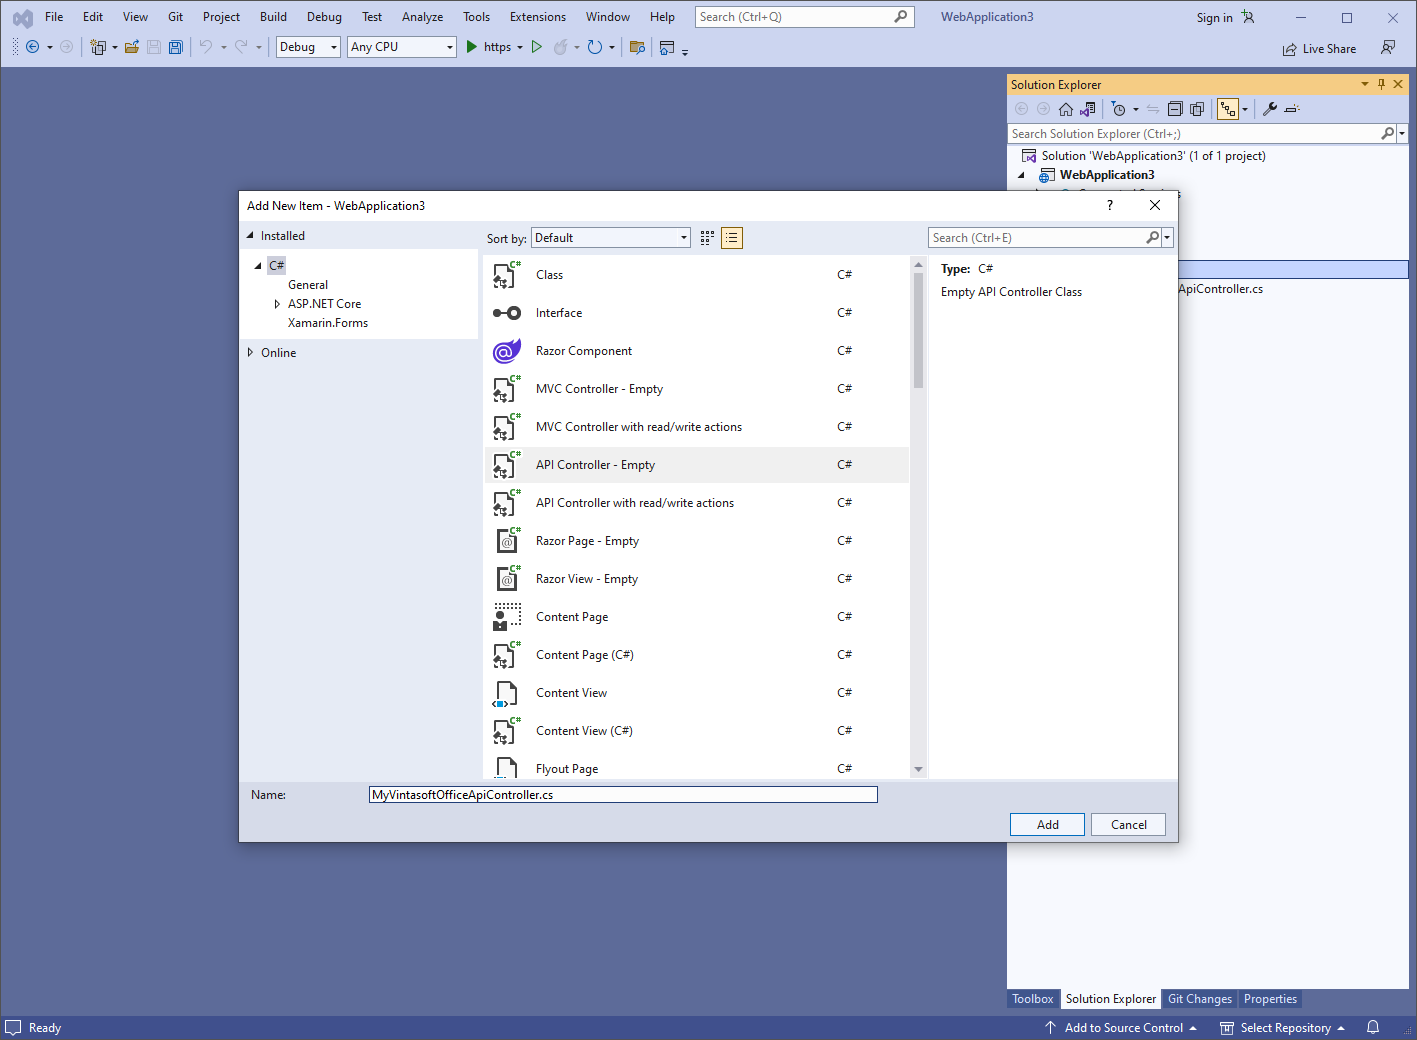
Select "Empty API controller" template, set the controller name to the "MyVintasoftOfficeApiController" and press the "Add" button
-
Specify that MyVintasoftOfficeApiController class is derived from Vintasoft.Imaging.Office.AspNetCore.ApiControllers.VintasoftOfficeApiController class
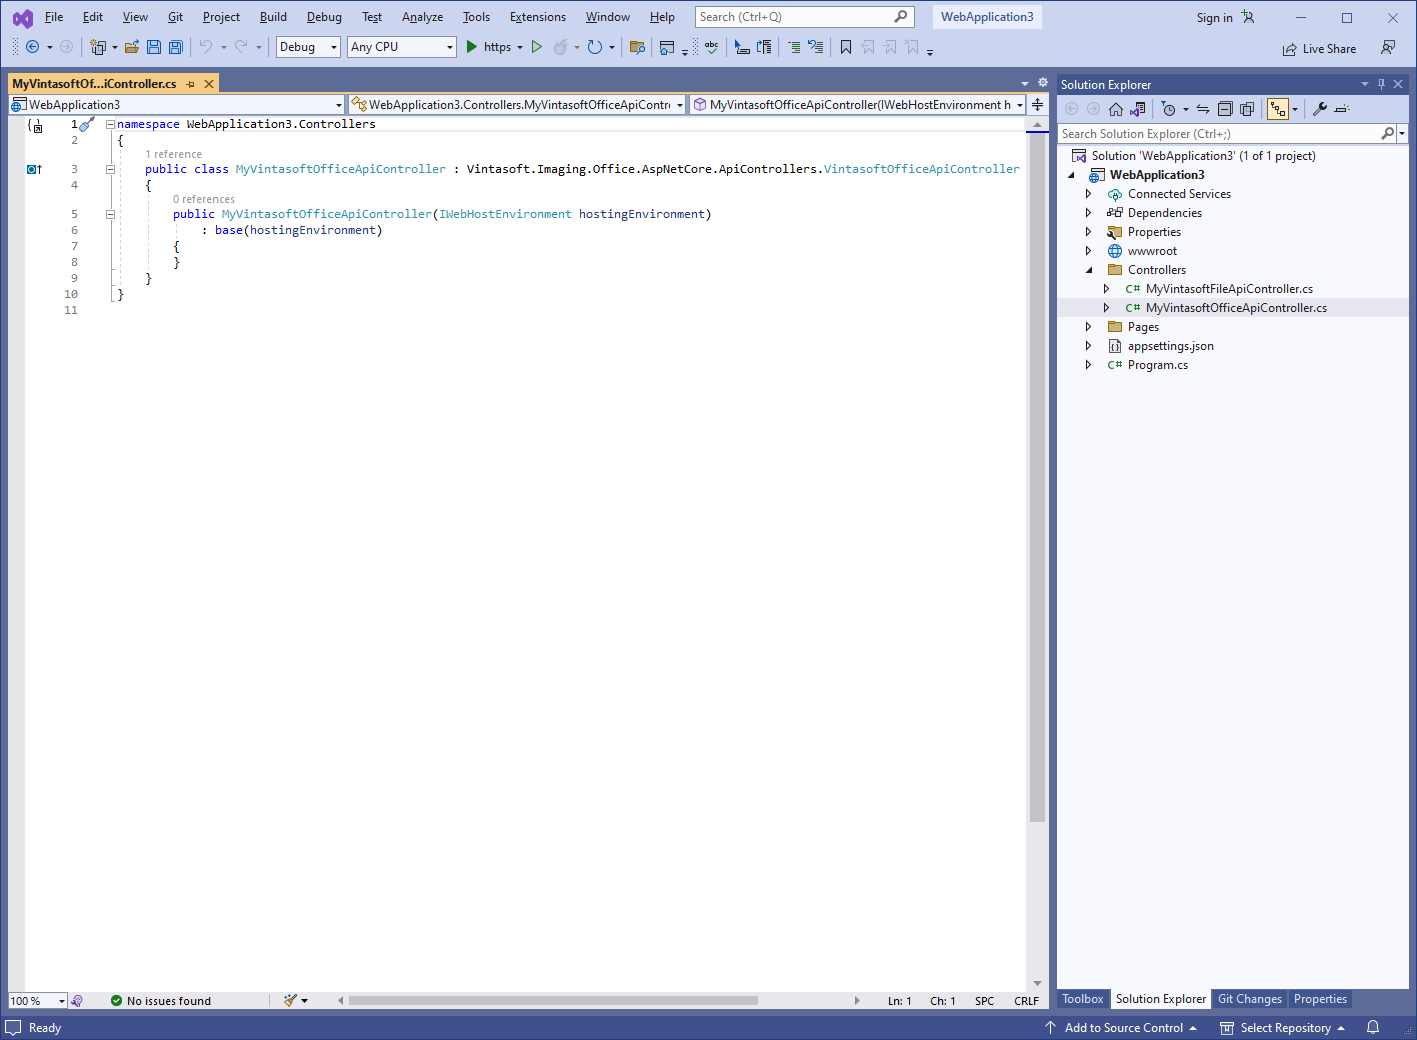
Here are source codes of MyVintasoftOfficeApiController class:
-
Press the right mouse button on the "Controllers" folder and select the "Add => Controller..." menu from context menu
-
Client side: Add JavaScript libraries to the project.
-
Add the "wwwroot\lib\Vintasoft\" folder to ASP.NET Core application.
-
Copy Vintasoft.Shared.js, Vintasoft.Imaging.js, Vintasoft.Imaging.css, Vintasoft.Imaging.Office.js, Vintasoft.Imaging.Office.css files from "<InstallPath>\VintaSoft Imaging .NET 15.0\Bin\JavaScript\" folder into "wwwroot\lib\Vintasoft\" folder.
-
Specify, which "standard" dialogs should be used by web spreadsheet editor
-
If web spreadsheet editor should use ready-to-use "standard" Bootstrap dialogs:
- Add Bootstrap and jQuery libraries to the project.
- Copy Vintasoft.Imaging.Dialogs.Bootstrap.js and Vintasoft.Imaging.Office.Dialogs.Bootstrap.js files from "<InstallPath>\VintaSoft Imaging .NET 15.0\Bin\JavaScript\" folder into "wwwroot\lib\Vintasoft\" folder.
-
If web spreadsheet editor should use ready-to-use "standard" jQuery UI-dialogs:
- Add jQuery and jQuery UI libraries to the project.
- Copy Vintasoft.Imaging.Dialogs.jQueryUI.js and Vintasoft.Imaging.Office.Dialogs.jQueryUI.js files from "<InstallPath>\VintaSoft Imaging .NET 15.0\Bin\JavaScript\" folder into "wwwroot\lib\Vintasoft\" folder.
- If web spreadsheet editor should use custom "standard" dialogs, please read how to create custom "standard" dialogs here.
-
If web spreadsheet editor should use ready-to-use "standard" Bootstrap dialogs:
-
Add the "wwwroot\lib\Vintasoft\" folder to ASP.NET Core application.
-
Client side: Add JavaScript code that allows to display document.
-
Create folder "wwwroot\UploadedImageFiles\SessionID" and copy any XLSX document to the folder. This document will be displayed in spreadsheet document editor.
-
Open file "Views\Home\Index.cshtml".
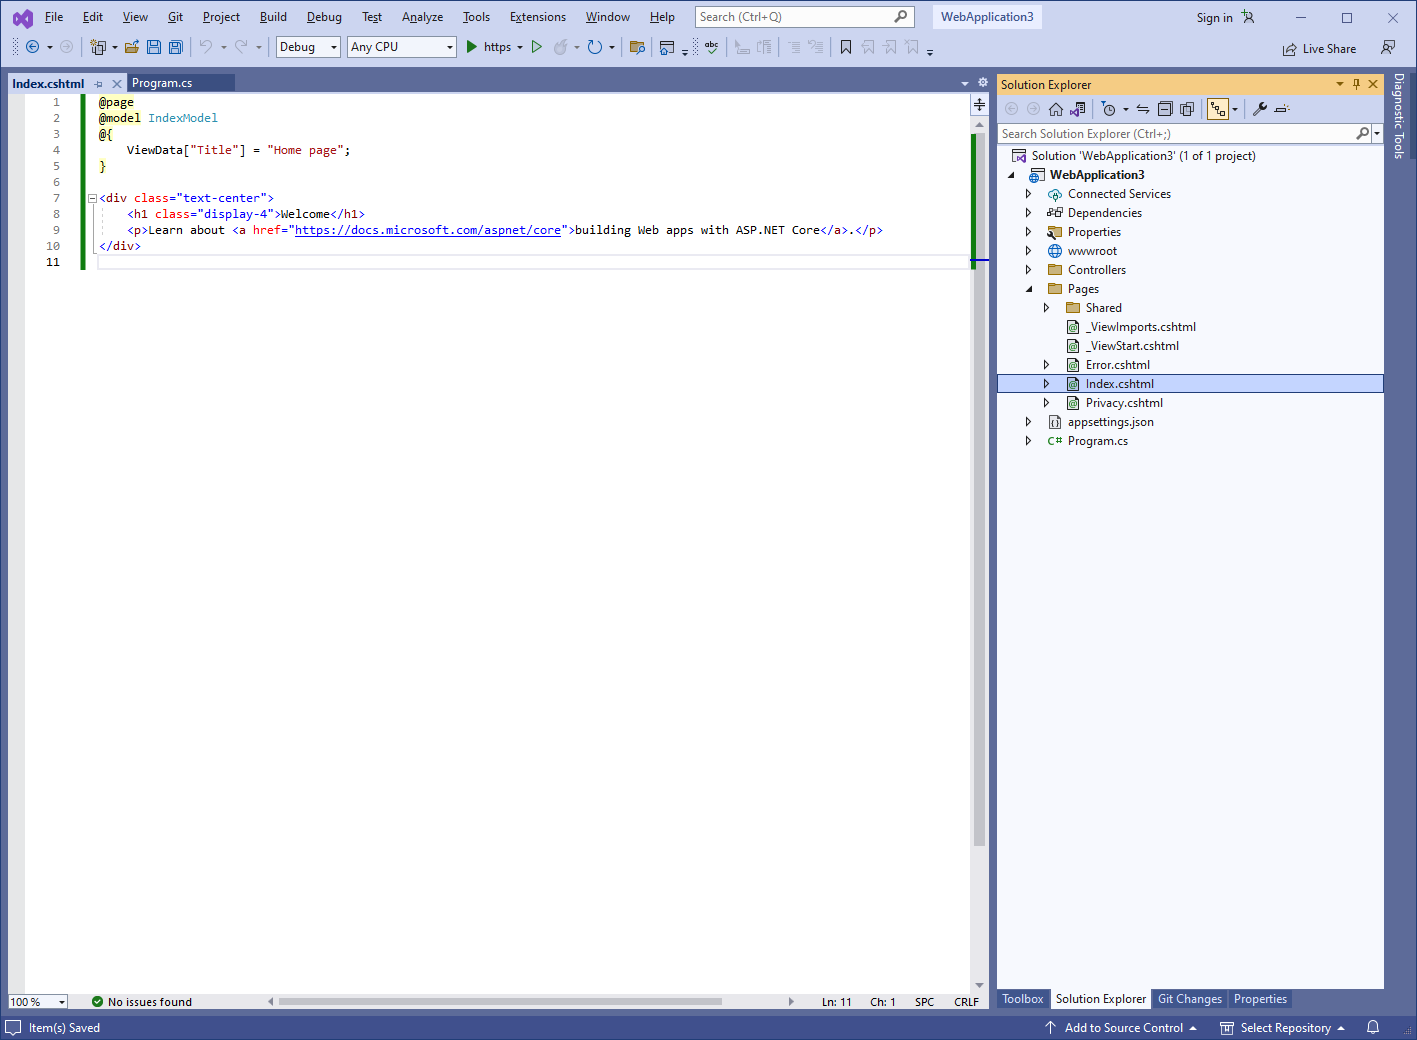
Add references to used JavaScript libraries:-
If Bootstrap dialogs are used, add references to the Bootstrap files and Vintasoft JavaScript files.
Here is HTML code that adds references to the Bootstrap and Vintasoft JavaScript files:
-
If jQuery UI-dialogs are used, add references to the jQuery files and Vintasoft JavaScript files.
Here is HTML code that adds references to the jQuery and Vintasoft JavaScript files:
Add HTML markup (a div-element that will display spreadsheet document editor) to the web view:
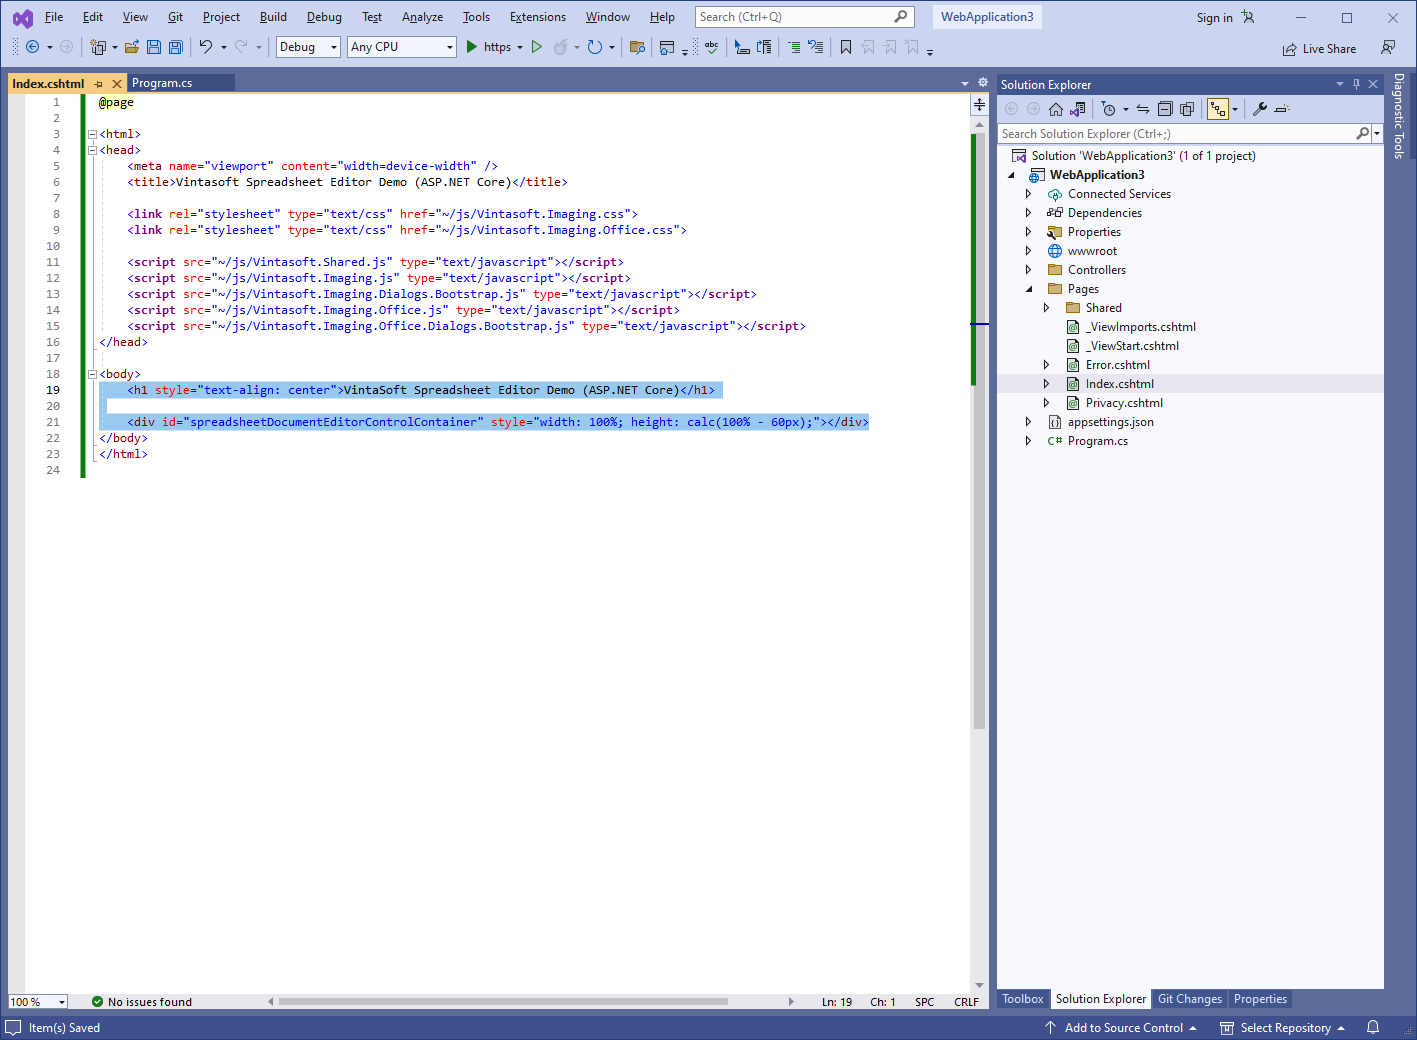
Here is HTML markup code:
-
If Bootstrap dialogs are used, add references to the Bootstrap files and Vintasoft JavaScript files.
-
Open "wwwroot\css\site.css" file, add CSS-style for "spreadsheetDocumentEditorControlContainer" to the "site.css" file:
-
Open file "wwwroot\js\site.js", add JavaScript code that initializes and creates web spreadsheet editor:
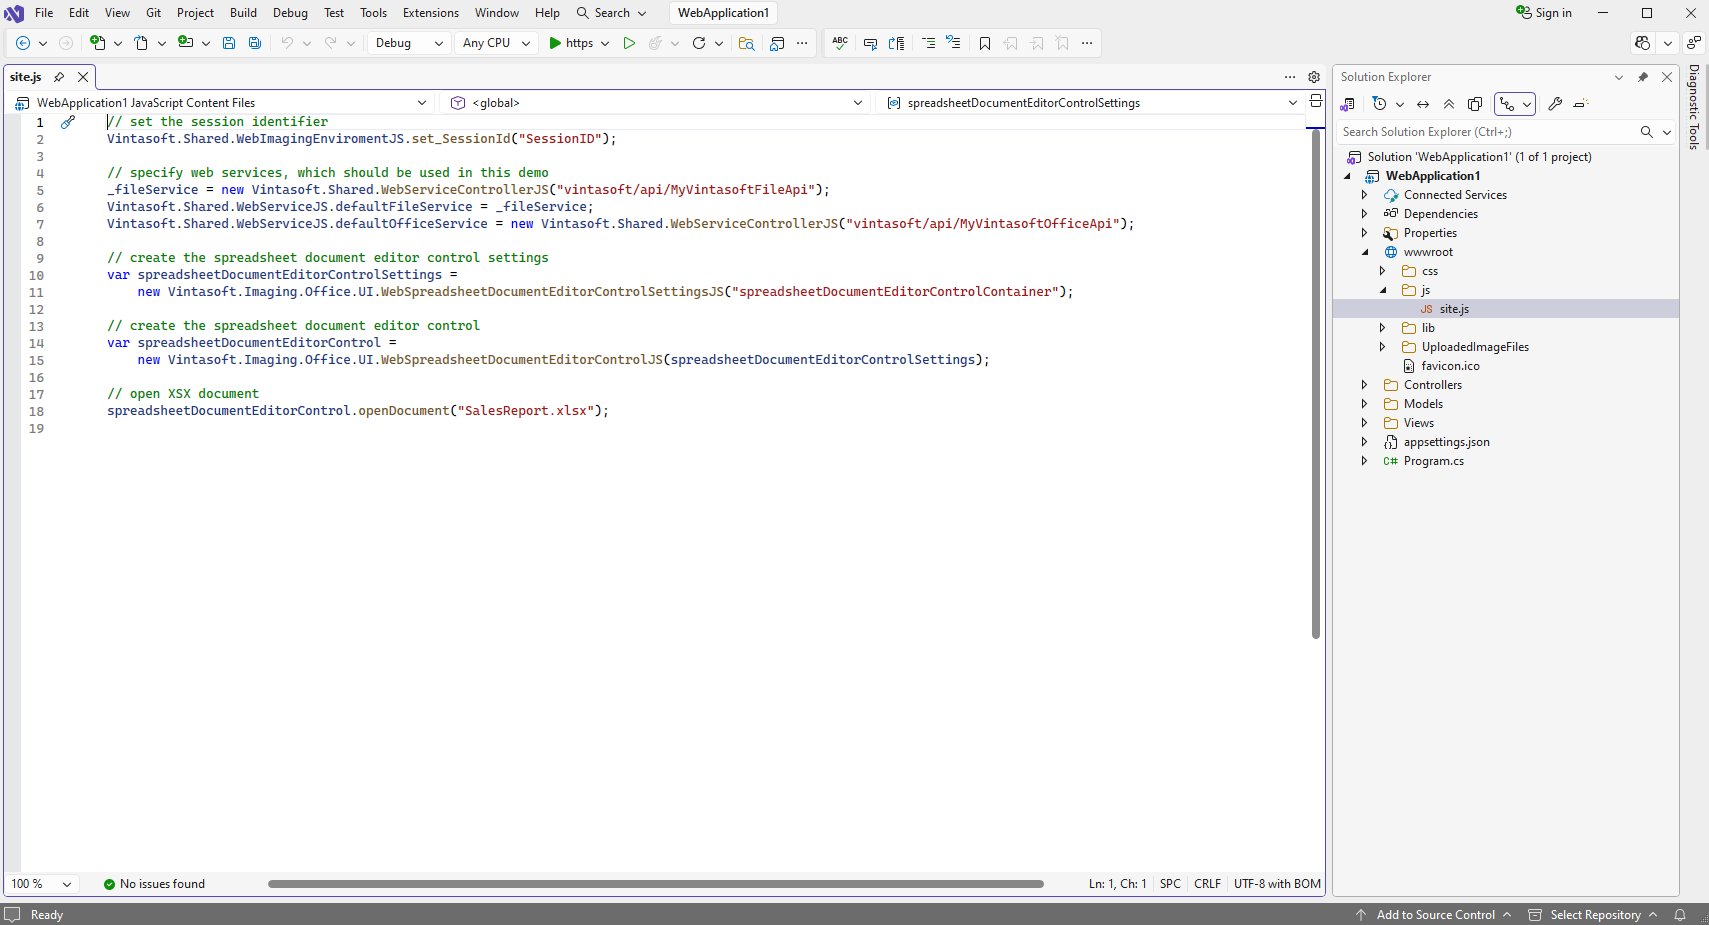
Here is JavaScript code that initializes and displays web spreadsheet editor:
-
Create folder "wwwroot\UploadedImageFiles\SessionID" and copy any XLSX document to the folder. This document will be displayed in spreadsheet document editor.
-
Run the ASP.NET Core application and see the result.